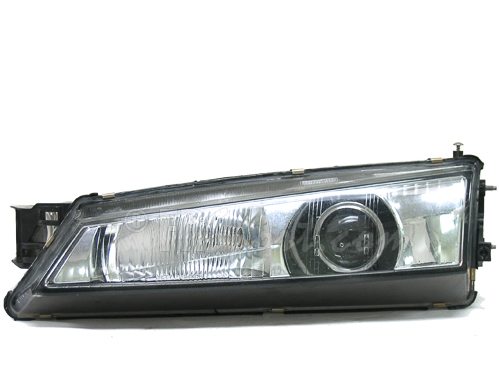
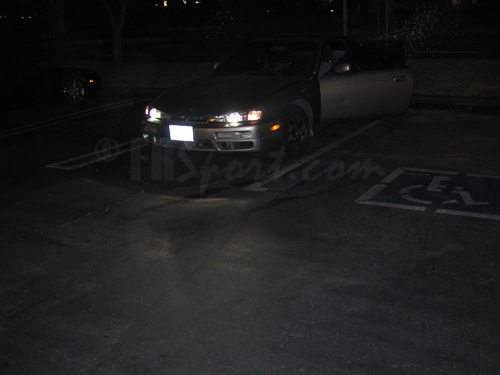
Upgrading from factory halogen lights to high intensity discharge lights usually produces dissatisfactory results due to way the OEM projector housing is designed (for halogen bulbs). Glare, uneven lighting, and poor cutoff are just some of the cons of retrofiting a halogen headlight housing with an HID kit.
Fortunately for S14 240SX owners, particularly 97 or 98 240SX, the Honda S2000 projectors are excellent replacement projectors for those who want to upgrade to an HID system without the drawbacks mentioned above. This guide gives you step-by-step instructions on how to modify your existing 97-98 S14 headlight housing to accomodate the S2000 projectors. The result is night and day. In the first picture, both S14s have HID kits installed. The one on the left has the 4300K bulb with no glare shield and the one on the right has the 6000K bulb with the glare shield. As you can see, the glare shield disperses the light slightly more evenly, but still produces some glare.
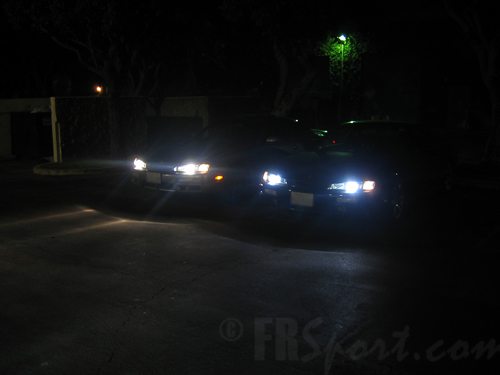
Fig. 1 – Left car has no glare shield
Before you start – some items are required
Tools required to do this job:
- a dremel (or equivalent) & cutting wheels to cut aluminum
- a grinder (or a dremel bit to grind)
- a drill (or a dremel drill bit)
- a flat & a philips screwdriver
- an 8mm and 10mm socket
- an oven big enough to heat up the projectors (a heat gun will also work, but is much harder to work with)
- a ruler and a permanent marker
Headlight retrofit items
- HID kit with ballasts and D2S bulbs
- S14 Kouki headlight assemblies (passenger and driver side)
- 04+ Honda S2000 projector assemblies (passenger and driver side)
Step 1 – Removing the headlight assembly
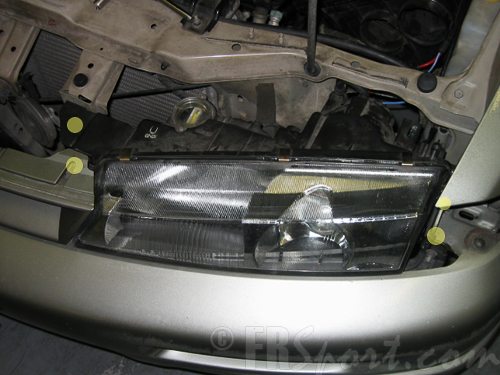
First, remove the headlight assembly from your vehicle. This is done by removing the philip screw holding the corner light and popping the light off. Next, remove the four 10mm bolts that hold the driver side headlight assembly to the chassis, highlighted in yellow in the picture. Two of the four bolts are behind the center grill. Do the same for the passenger side. Carefully remove the two assemblies (along with the center grille). You can detach the center grill by using a pair of pliers behind the headlight assembly to remove the clips holding grille to the assembly.
Fig. 2 – Unbolt 4 10mm bolts & nuts highlighted in picture above
Step 2 – Disassemble the headlight assembly
Before we begin step two, pre-heat an oven since it will used to bake – yes, bake – the headlight assemblies in the next step. Set the temperature to no more than 225º F. Remove the clips that hold the glass to the housing as shown in picture below. There are 8 clips per headlight assembly. The glass is sealed to the housing and held in place by tar. You will need to heat up the tar so the two can be seperated. Bake the headlight assembly in the oven for about 5 – 10 minutes. After 5 minutes, the tar should soften up slightly to allow you to seperate the glass from the plastic housing.
Remove the two philip screws holding the plastic shroud around the projector. Loosen the three 8mm bolts holding the aluminum frame to the housing. Remove 4 philip screws holding the projector to the frame.
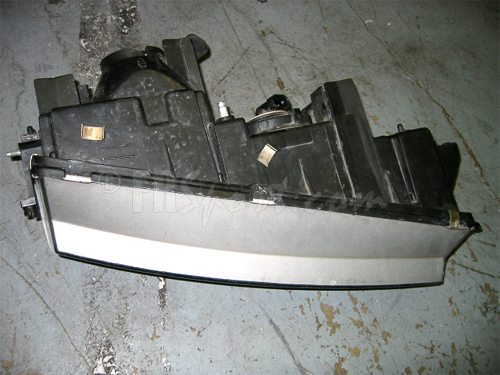
Fig. 3 – Remove the eight clips holding the glass to the housing
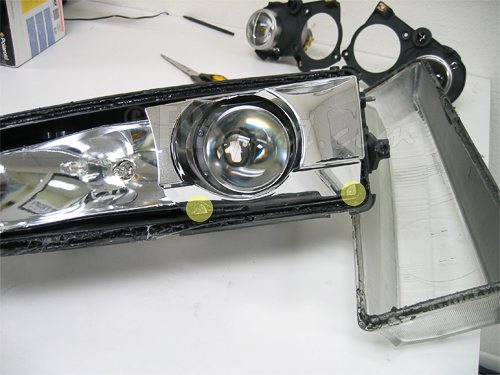
Fig. 4 – The headlight assembly after baking and removing the glass. Remove the two philips screw to remove plastic shield
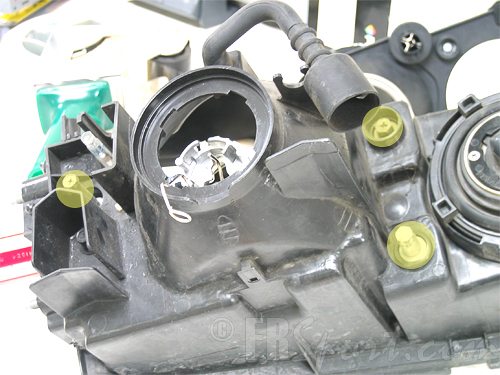
Fig. 5 – Loosen the three 8mm bolts that attaches the frame to the housing
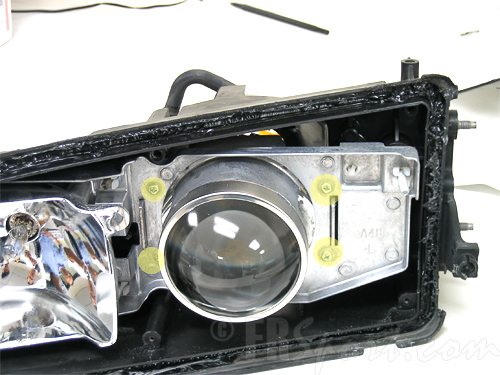
Fig. 6 – Remove the four screws to seperate the projector from the frame
Step 3 – Modifying the pieces – break out that Dremel!
Every portion of this step is crucial in the conversion process because it can be an expensive screwup if things go bad. With the frame removed, use a ruler to find the center of the slots on the frame and mark it. Draw a centerline across the frame using the center points. This will be your alignment mark later. Set this aside – now it’s time to modify the S2000 projectors.
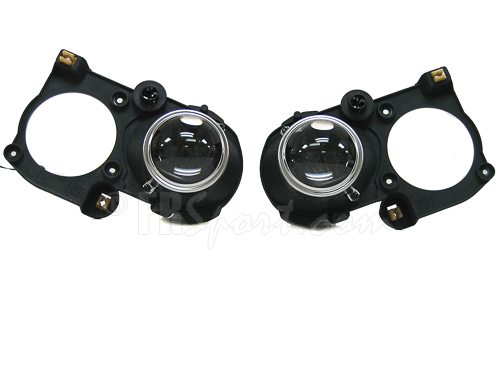
Fig. 7 – Stock S2000 projectors & bracket
Each S2000 projector is labeled “L” or “R”. You will be using the “R” projector on the driver side headlight assembly, and the “L” projector on the passenger side assembly. You need to remove the extra material from the S2000 projectors, as highlighted in yellow in the following picture. Do not cut past the two mounting points next to the yellow area as those will be required to mount the projectors onto the stock OEM aluminum frame.
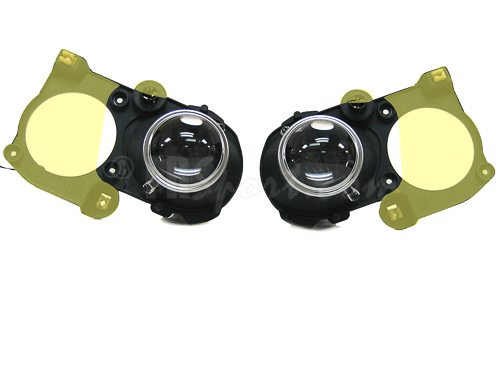
Fig. 8 – Material to be removed from the S2000 projectors
Next, CAREFULLY remove material from the stock S14 projector frame so that the S2000 projector housing will fit into the frame. The S2000 projector will not sit perfectly flush against the stock frame, however, the back of the S2000 will sit flush against the edge of the frame so you will need to use the two mounting points on the S2000 projector to secure the projector onto the frame.
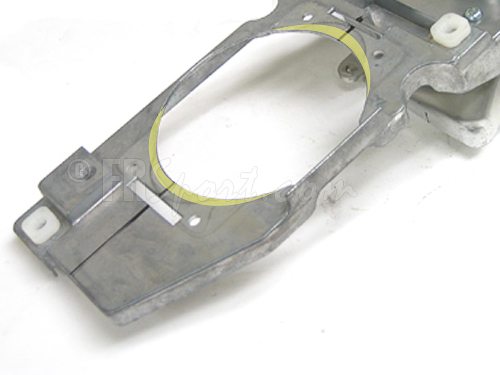
Fig. 9 – Centerline for alignment later and material to be removed highlighted in yellow to make room for the S2000 projectors
Remember that centerline that was drawn earlier? You will need to align the cutoff blade inside the S2000 projector housing to the line you drew earlier. Align them up, and drill through the frame using the two mounting points on the S2000 projectors as a guide. Get some bolts and nuts and secure the two together.
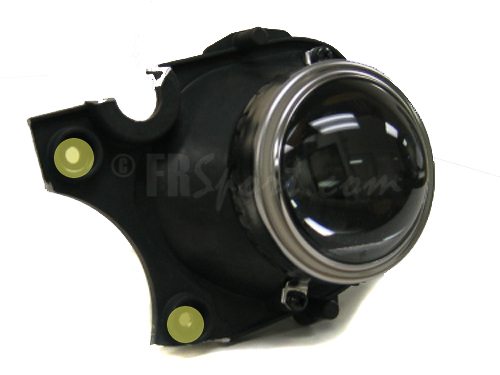
Fig. 10 – Holes use to mount S2000 projectors onto stock frame
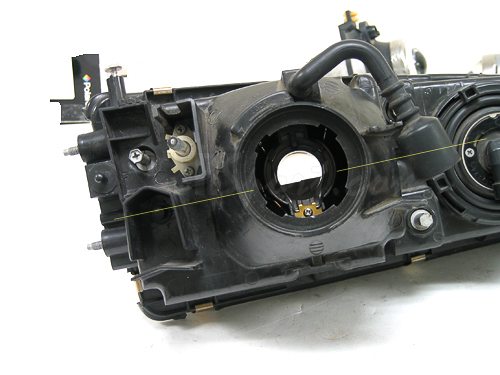
Fig. 11 – Cutoff blade of S2000 lined up with centerline drawn on frame in Fig. 9
After fitting and securing the new projector on the frame, it’s time to assemble everything back together again. Bolt the frame back onto the headlight housing. The plastic projector shroud needs to be modified slightly so that it can fit over the new projector housing. The top needs to be removed slightly to accomodate the S2000 projector housing screw, as shown in the picture. Re-install the two philip screws.
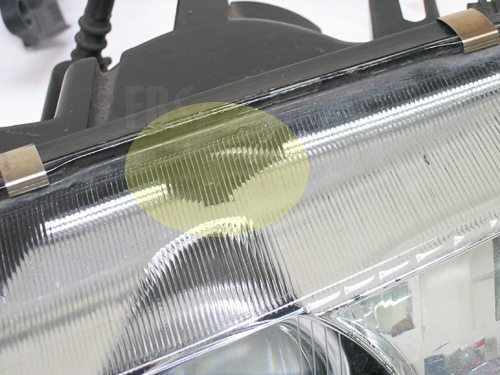
Fig. 11 – Holes use to mount S2000 projectors onto stock frame
Step 4 – Baking the headlight assembly again
Pre-heat your oven to 200-225º F again and place the glass and assembly housing in the oven. After a few minutes, re-install the glass and place the clips back on. Place the completed assembly back in the oven a few more minutes to allow the tar to seal up the assembly evenly. Finally, remove it and press the assembly together further with the clips in place.
Repeat the same procedures with the other headlight assembly. Prepare to spend a whole day on the process. After you are finished, the headlight assembly should look similar to the image below. Re-install the headlight assemblies and the center grille. Follow the instructions included with your HID kit to install the HID kit. Don’t forget to aim your headlights after you’re finished!
If done correctly, your new headlights should look like what’s in the images below!
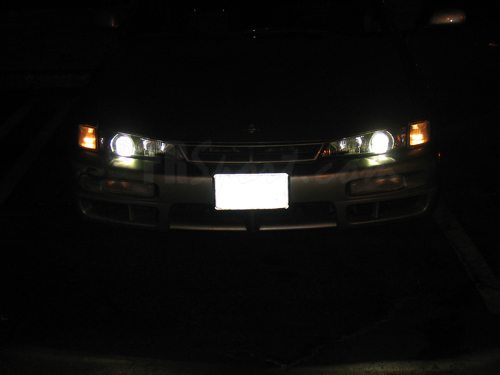
Fig. 13 – Look, no more glare!
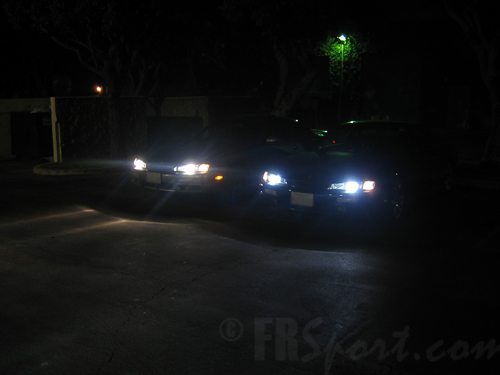
Fig. 14 – Before – so much wasted light
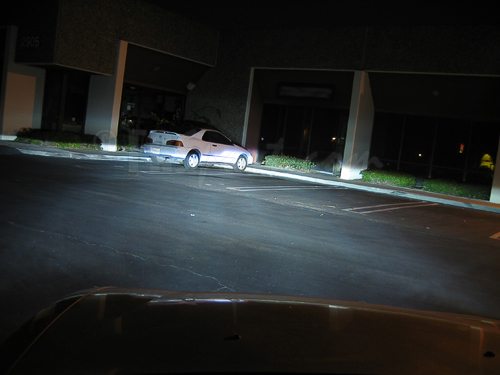
Fig. 14 – How’s that for an HID upgrade?
The following guide is for informational purposes ONLY. We are not responsible for anything that happens as a result of the information on page. Retrofitting a halogen headlight system with HIDs may be illegal in your state and is not DOT certified.
Apparently, this headlight retrofit has been done before by someone who goes by “nrgonline”. Credit goes to him for some of the information presented on this page.
The information presented here are for informative purposes only and is presented as-is. We are not responsible for anything may happen as a result of the content presented on this page and cannot provide support for this content.

