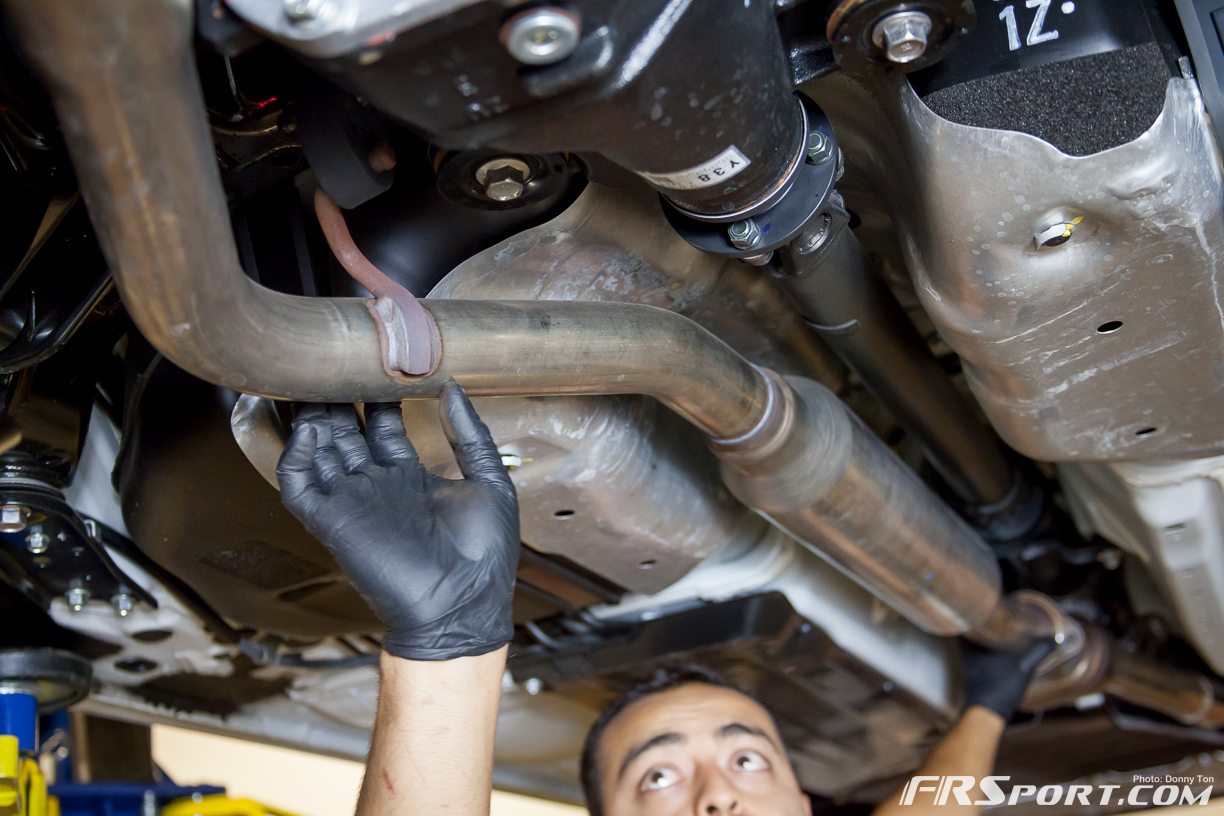
To start the install off we needed to get some things out of the way, specially the exhaust. We removed the Exhaust as it was going to get in the way of removing the LSD housing so it had to go. If you are not familiar with this process please refer to our previous exhaust removal write-up in order to observe the process.
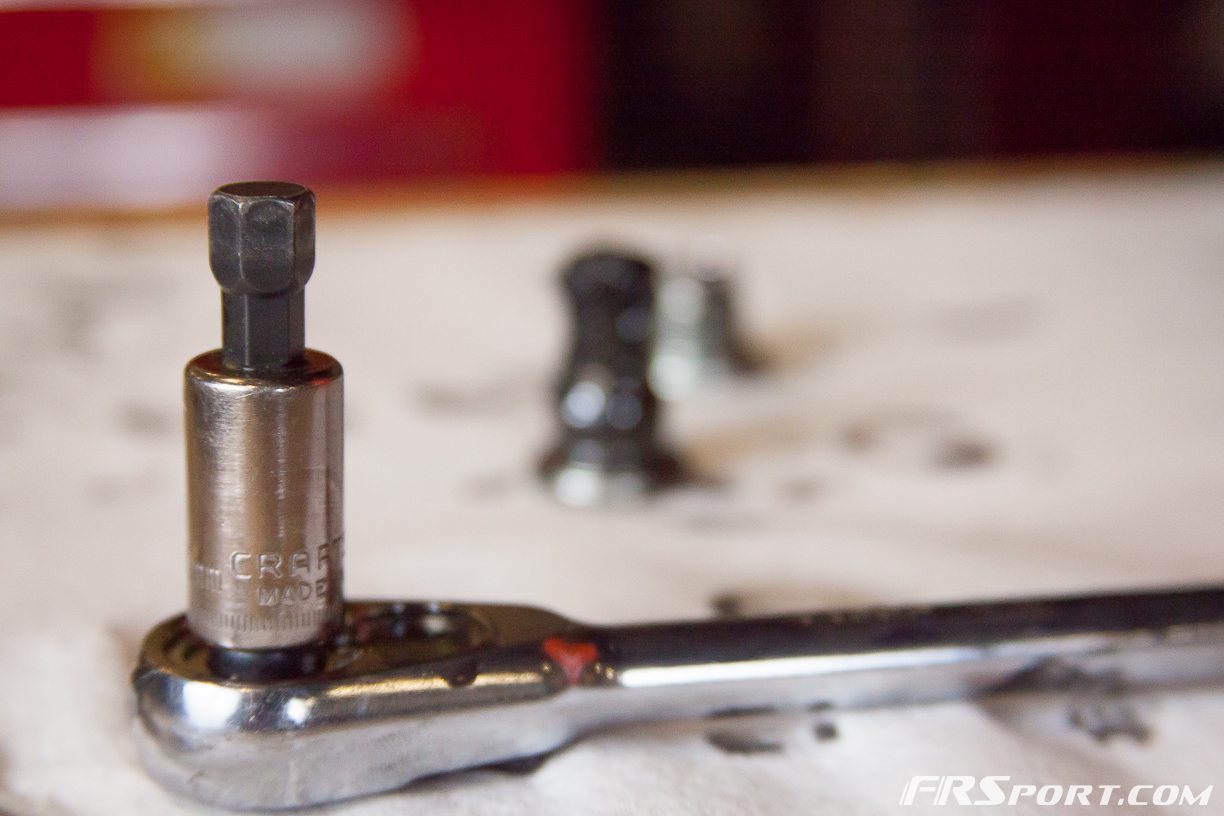
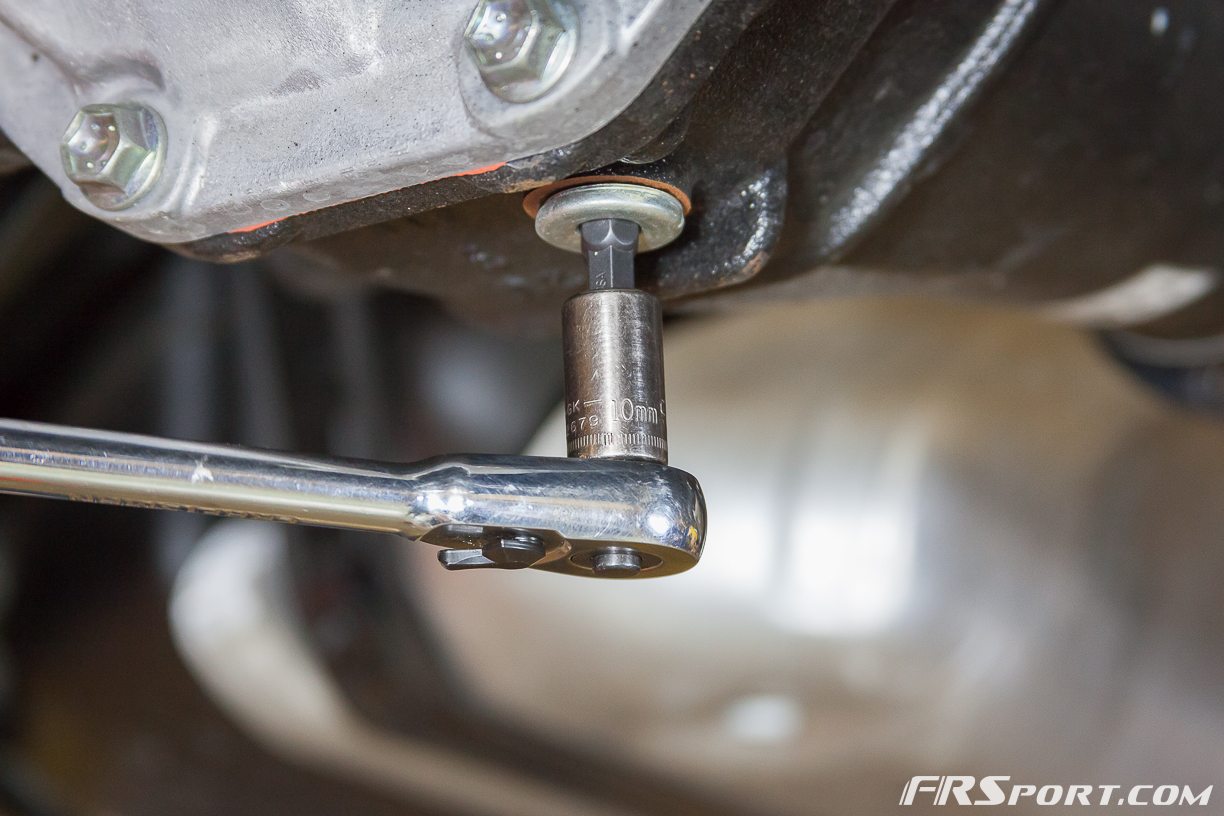
Our next step was to Drain the Oil. We removed the fill bolt with a 10mm allen key so it would splash less when we removing the bottom fill bolt to drain the LSD oil. We then removed the drain bolt with the 10mm allen as well.
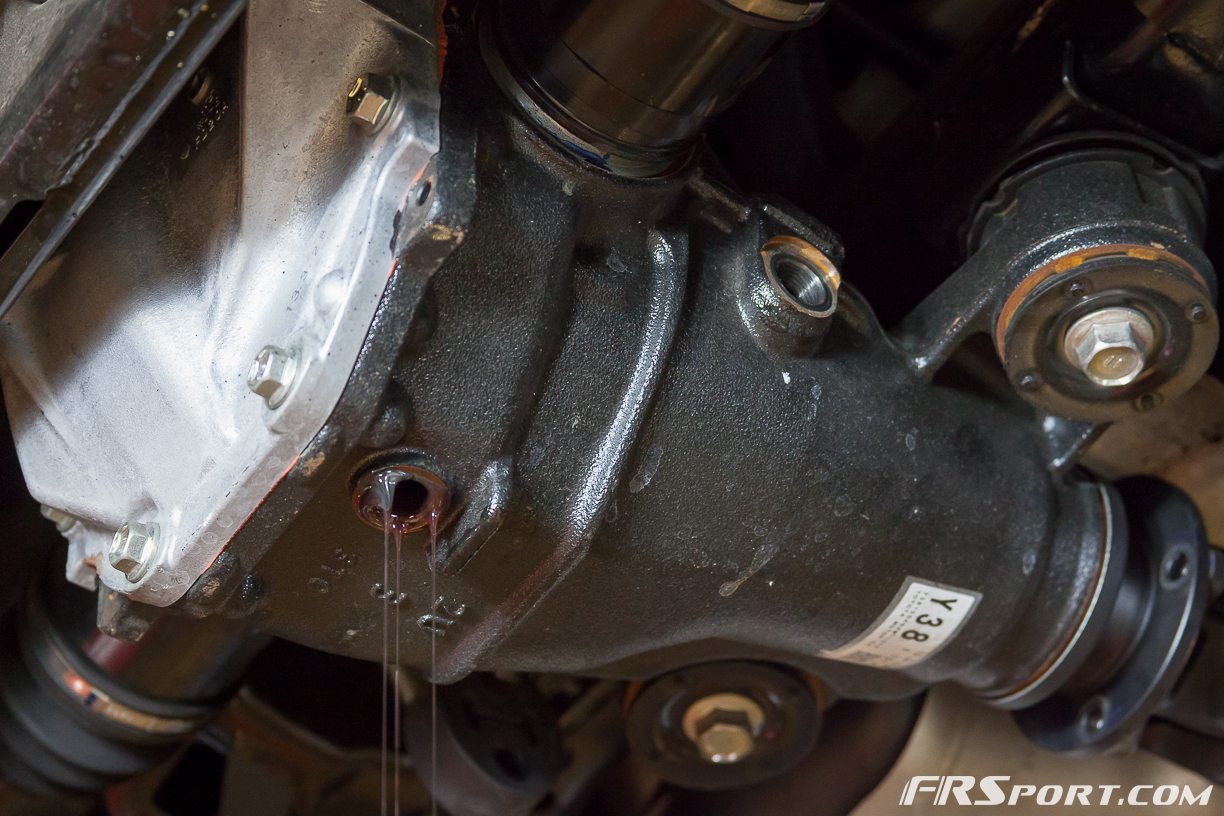

After that we drained the differential oil into a drain pan and cleaned off any residue on the bolts; specially the lower one as it has the magnet that collects any metal shards. We then put the drain plug and fill plug back in. Before doing so however, we made sure to have the appropriate crush washer to prevent any sort of threading.
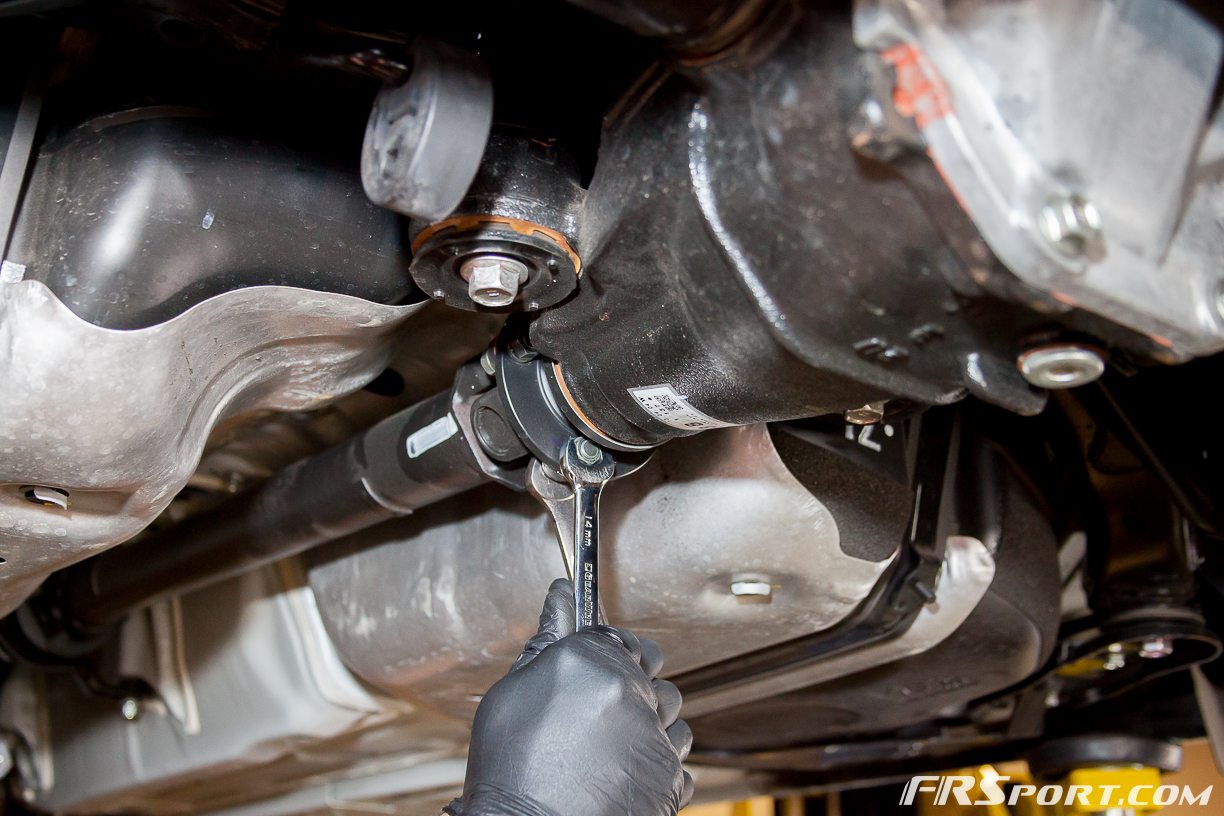
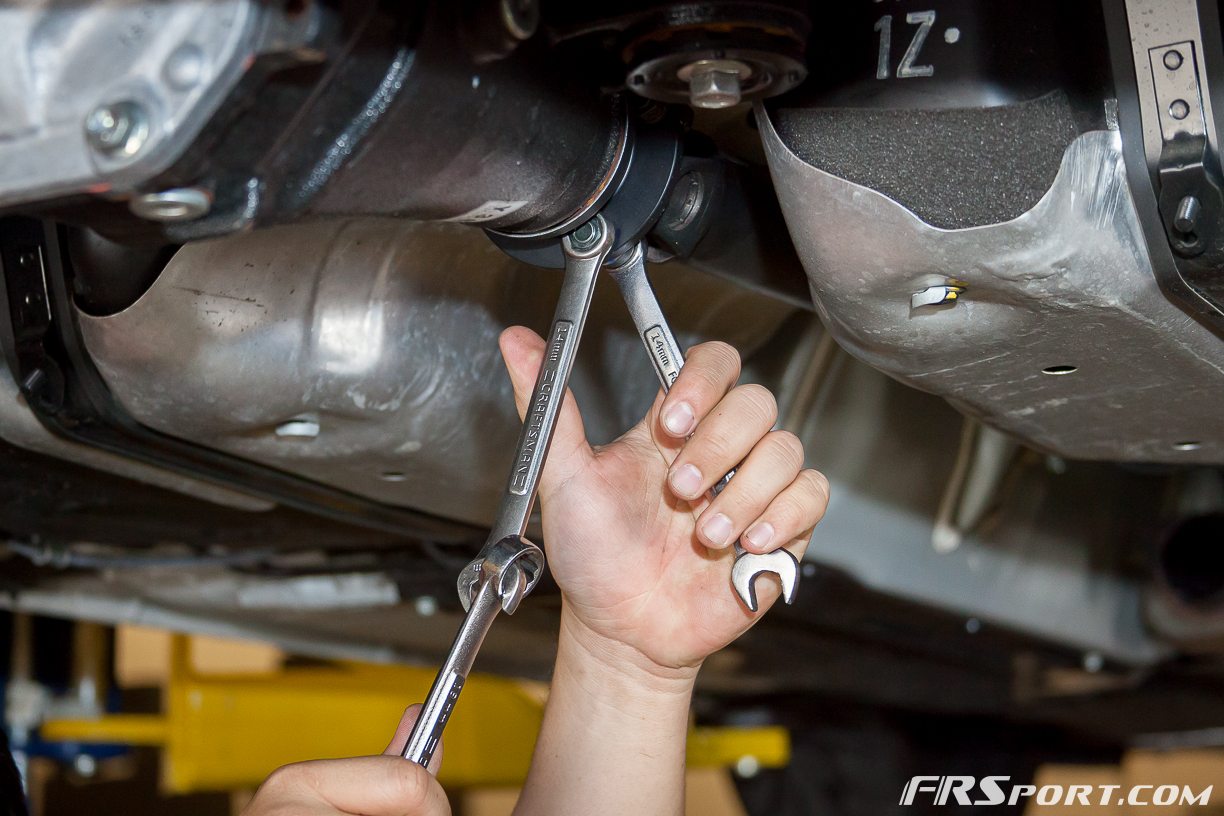
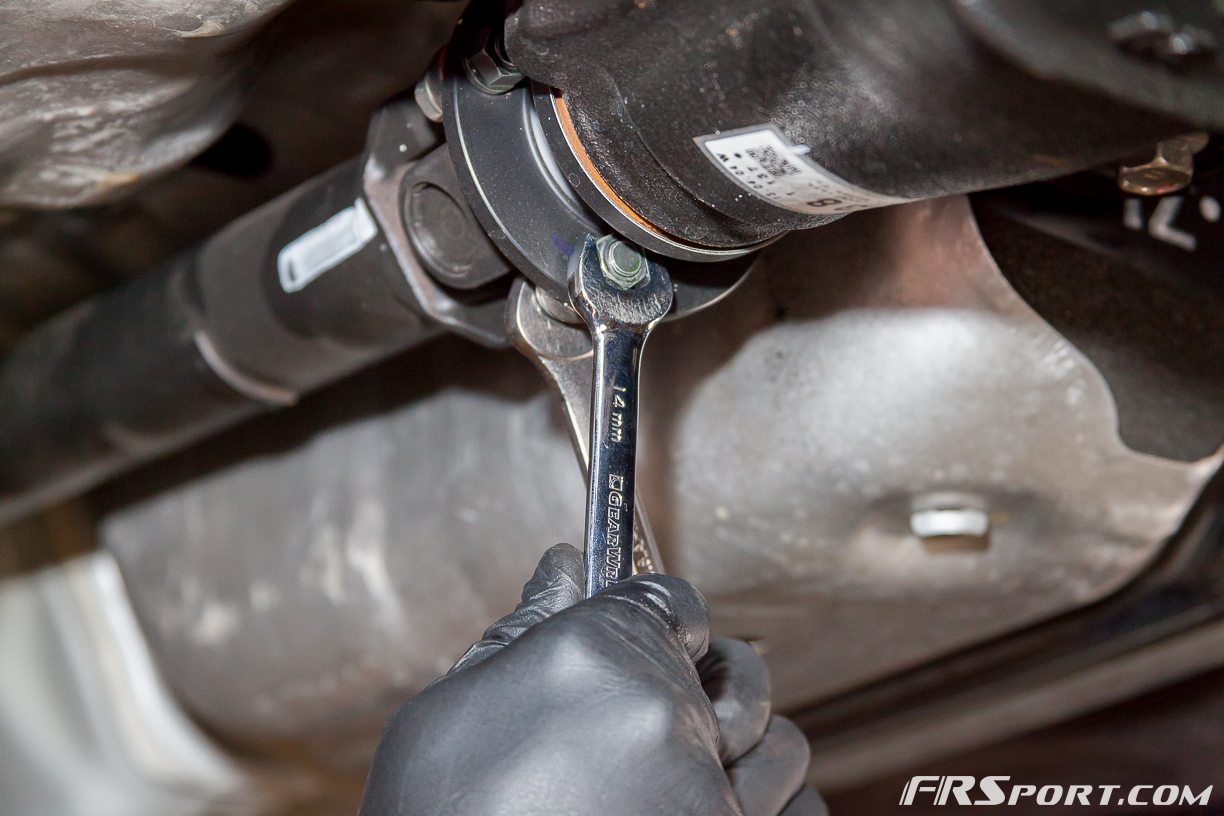
Next we moved to decouple the driveshaft from the differential. We removed the 4 nuts/bolts that attached the driveshaft to the differential housing. We used two 14mm wrenches to do this. It’s difficult, but possible to do it with just regular wrenches. Long wrenches with more leverage also help a lot.
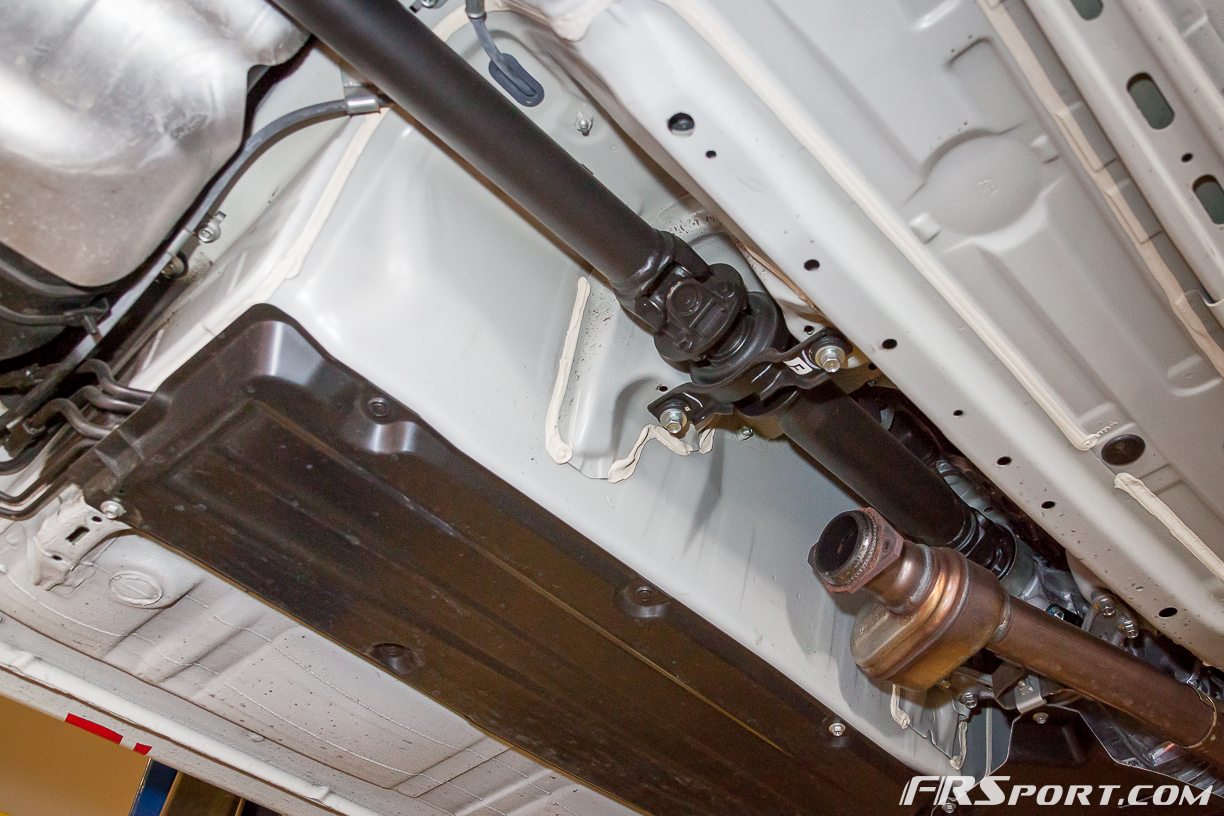
After that we loosen two bolts holding up the center of the driveshaft assembly. We would recommend not removing them entirely however. If you remove the driveshaft from the tranny, you will need to refill the fluid and get yourself into a another task.

We pried the rear of the driveshaft off the carrier housing using a pry bar and let the driveshaft hang. Be careful not to hit your head while working on the differential as we had many close calls haha.
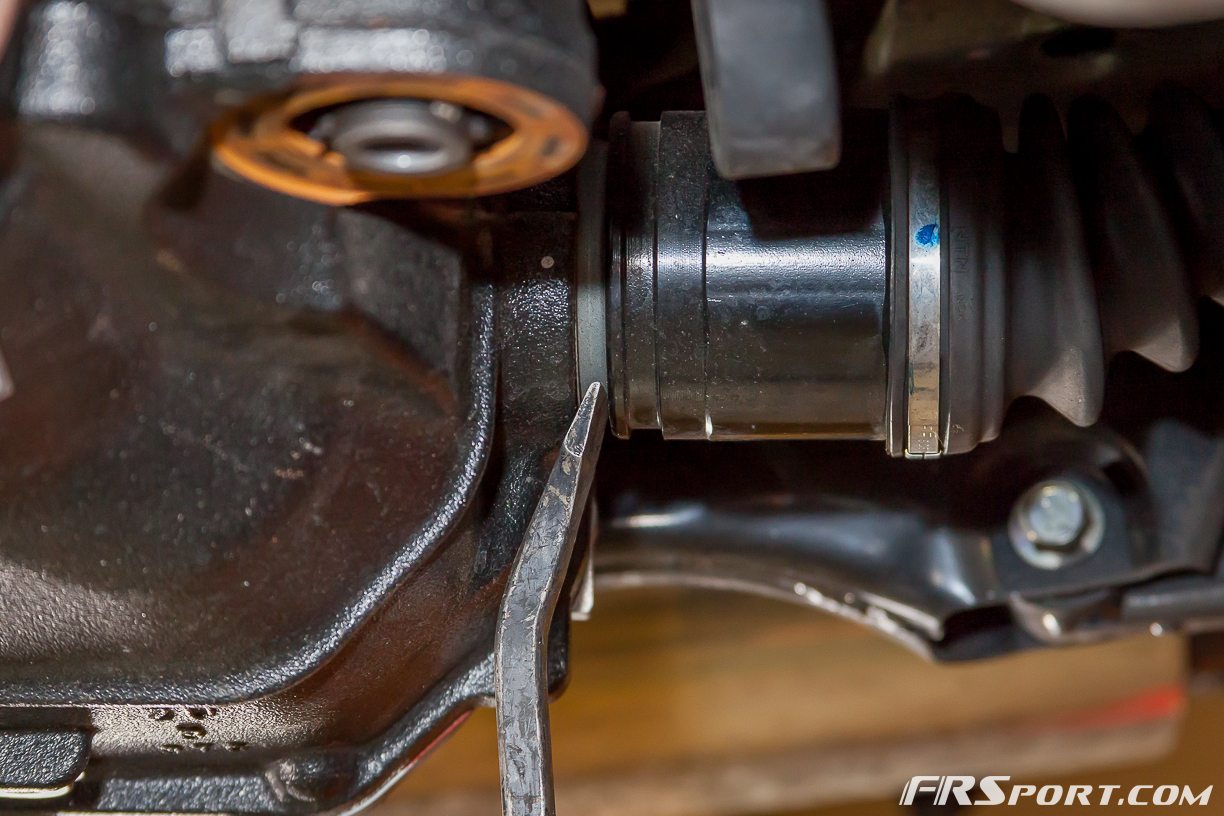

Next, we removed the axles off the differential. We wanted to do this now as it was easier when the front ear bolts and rear bushing bolts were in. We made sure to pry it at the correct location as noted in the picture. If one pries the shield it will break, so we were very careful. After this popped out about 1/2 an inch and we called it a success. We were not be able to remove the axles completely at this point however since the pumpkin was still attached to the sub-frame.

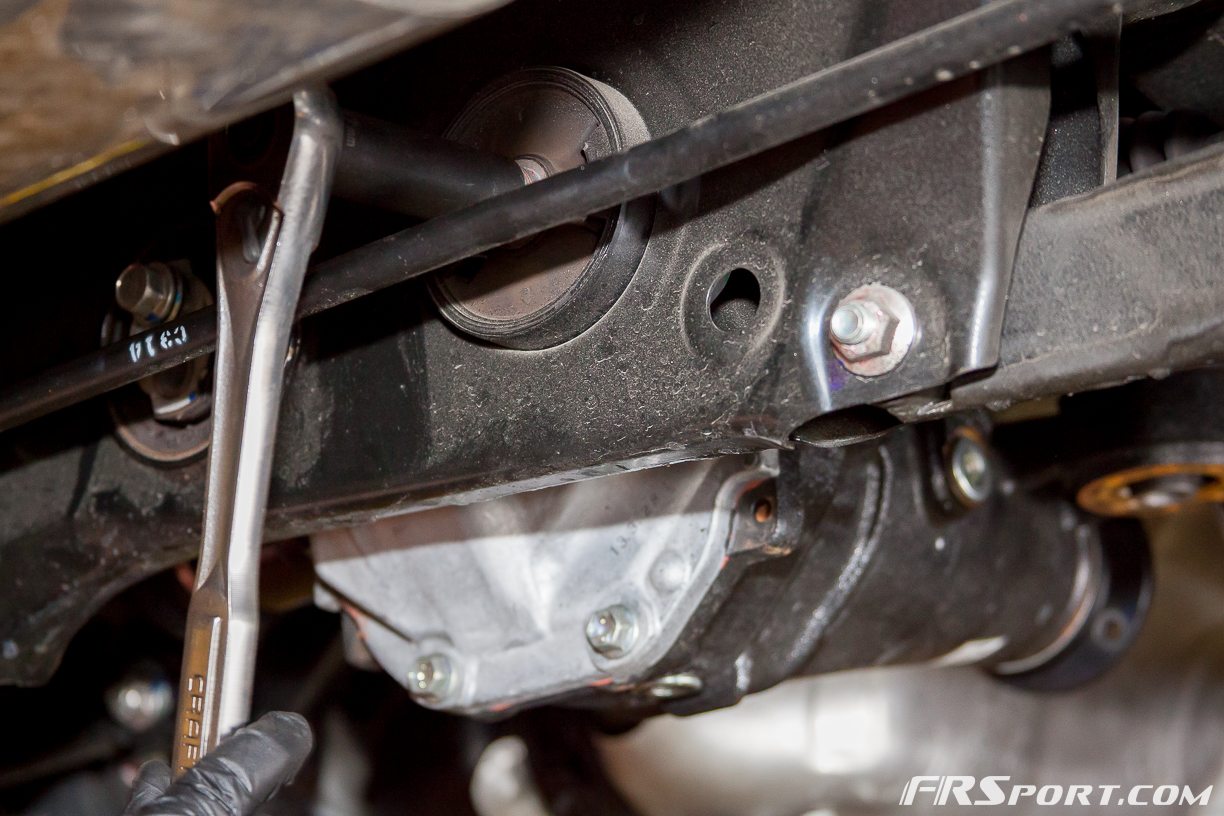
Our next step was to remove the Rear Bushing bolts. We removed the two 17 mm rear bolts holding up the differential cover on the left side bushing. Then we proceed to loosen the right bolt holding the rear differential cover bushing. We used a 17 mm 1/2 inch deep socket. Because many people will have different exhausts we used personally used our best judgement on socket selection to maneuver appropriately. At this point we would strongly recommend you have someone help support the differential housing. A Transmission jack would have helped as well.
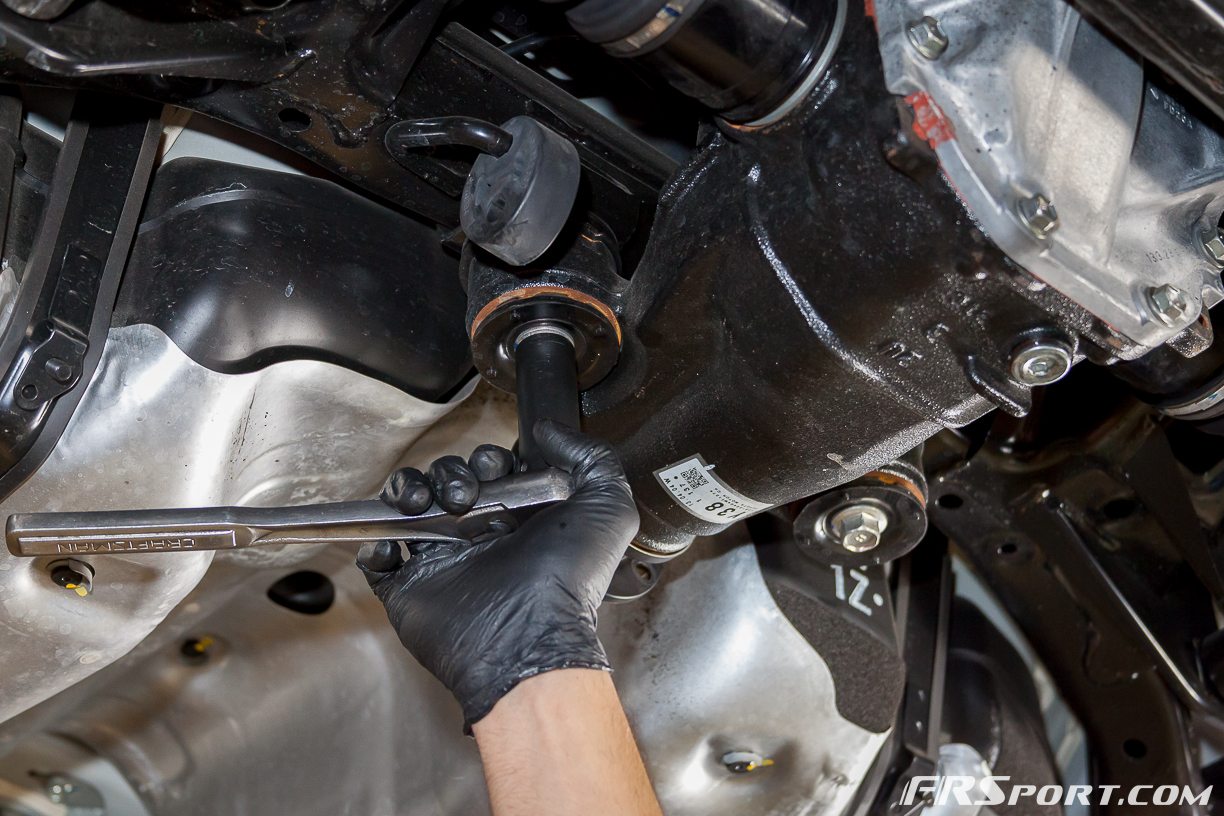
The Last bolts we needed to remove were the two frontal Differential “Ear” Bolts. This is where our friends or a tranny’ jack come in handy. We proceeded to remove the left bolt holding up the differential ear then the right bolt holding up the other one.
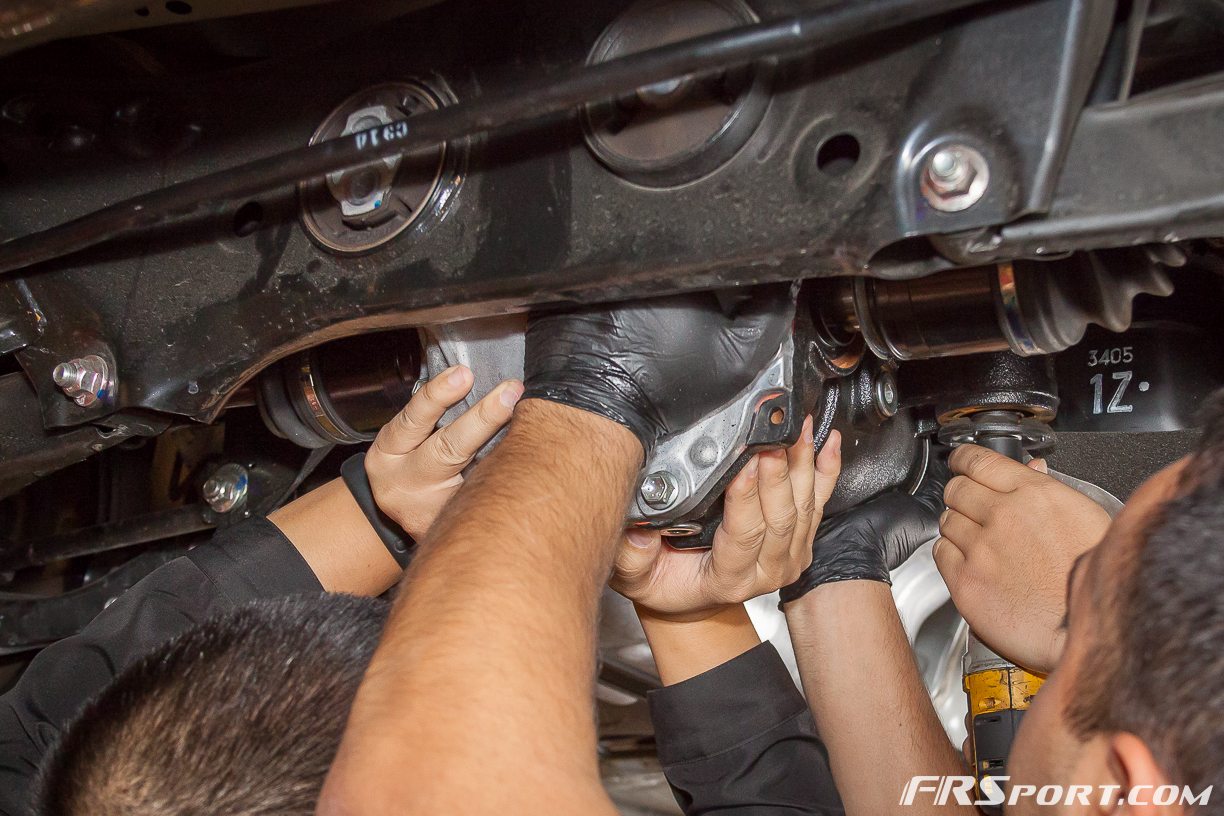

Once the last bolt was out we carefully guided the Differential case down and proceeded to remove the shorter axle first. This would be the unit closes to the passenger side. Finally we removed the driver side axle and had the pumpkin completely out.
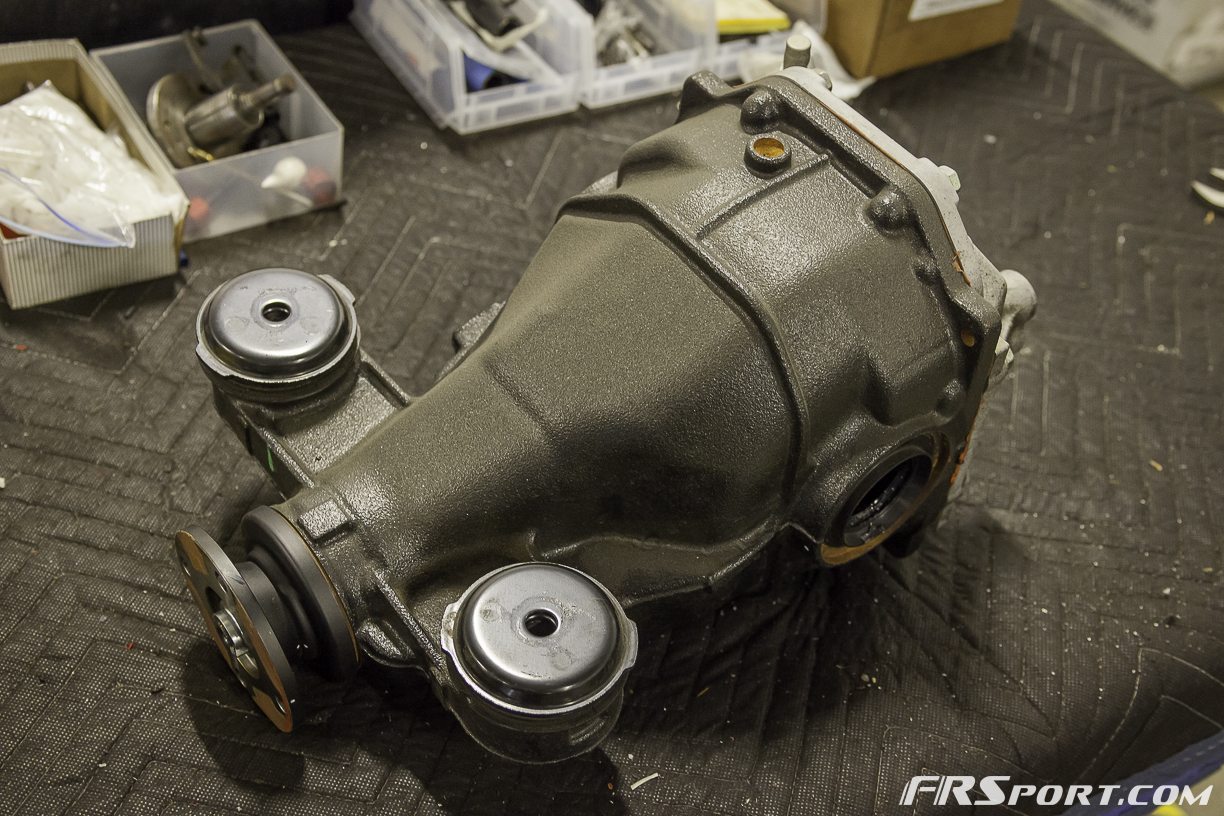
After we had the differential case out, we set it down somewhere where we could easily work on it. A sturdy table top worked great.

We then proceeded to remove all the 14 mm bolts securing the rear differential cover with a 14 mm socket.
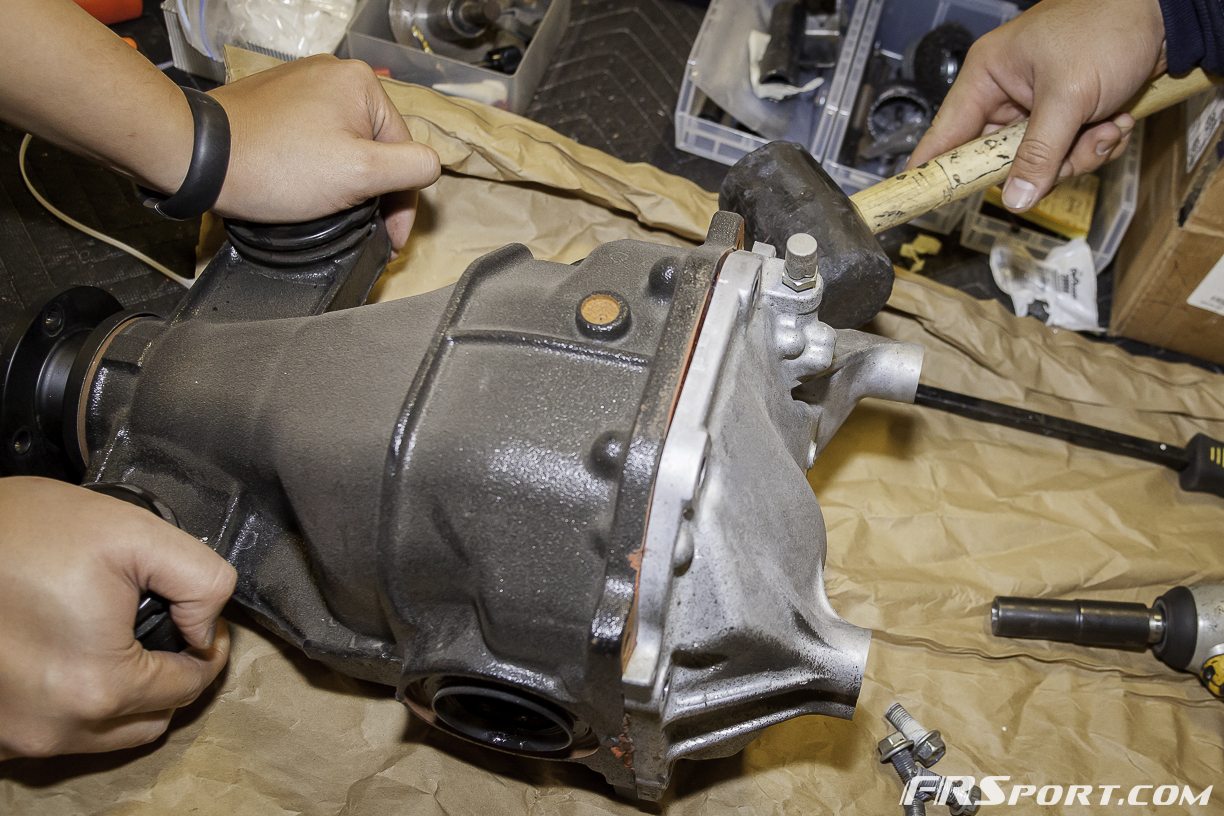
Once they were all out we got a small hammer and gently dislodged the rear cover until it was completely off. A good spot to tap it from would be the Right Bushing Bolt receiver section. This allowed us to easily pop the cover off.
After the cover was removed we made sure to clean the surrounding, mating area with a screwdriver or knife blade. We were extremely careful not to damage this surface.
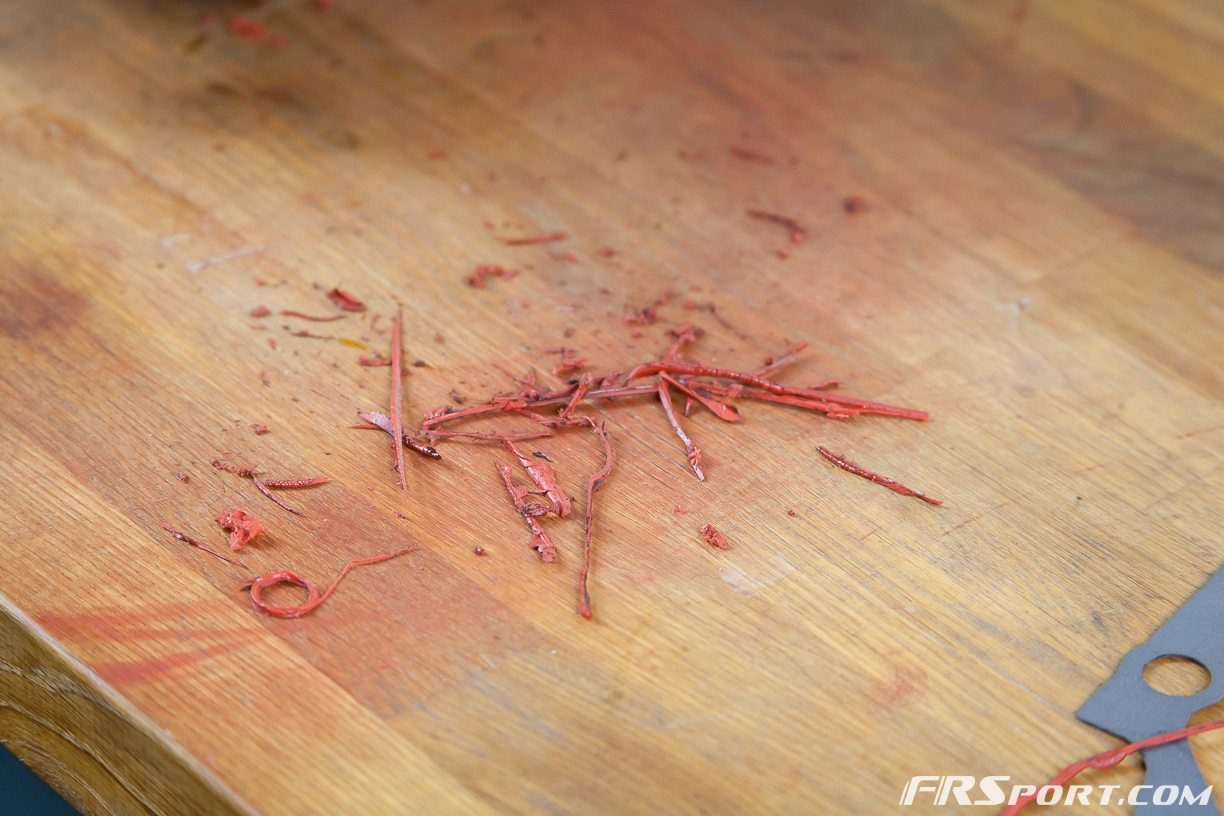
We saw that a lot of silicone RTV come off and figured it could potentially mess with our re-installation.

We also decided to use a brand new prototype LSD Gasket produced by DIF and exclusively offered by FR Sport. This gasket ensures better sealing than simply using silicone RTV. After working with this pumpkin’s internals aka the differential, we now strongly recommend using this gasket (If you do not have access to the gasket the RTV will work as a last resort).
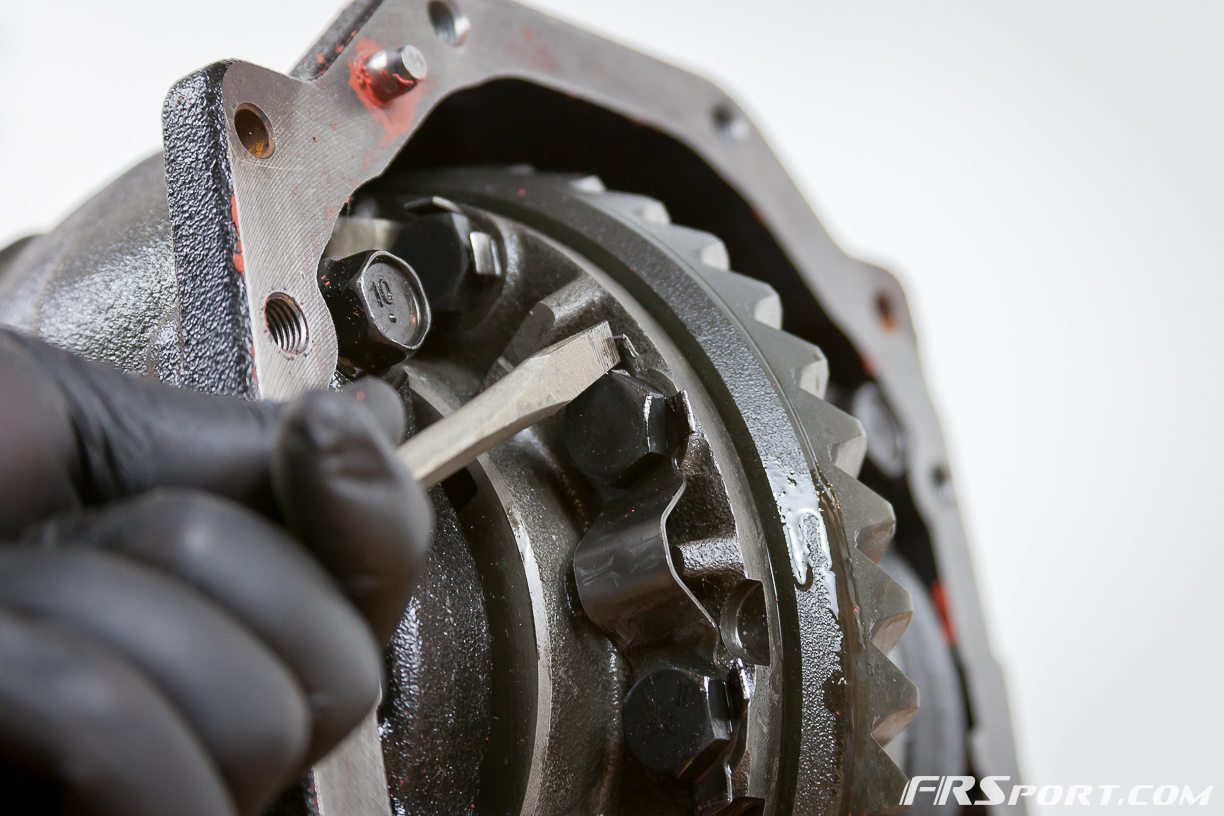
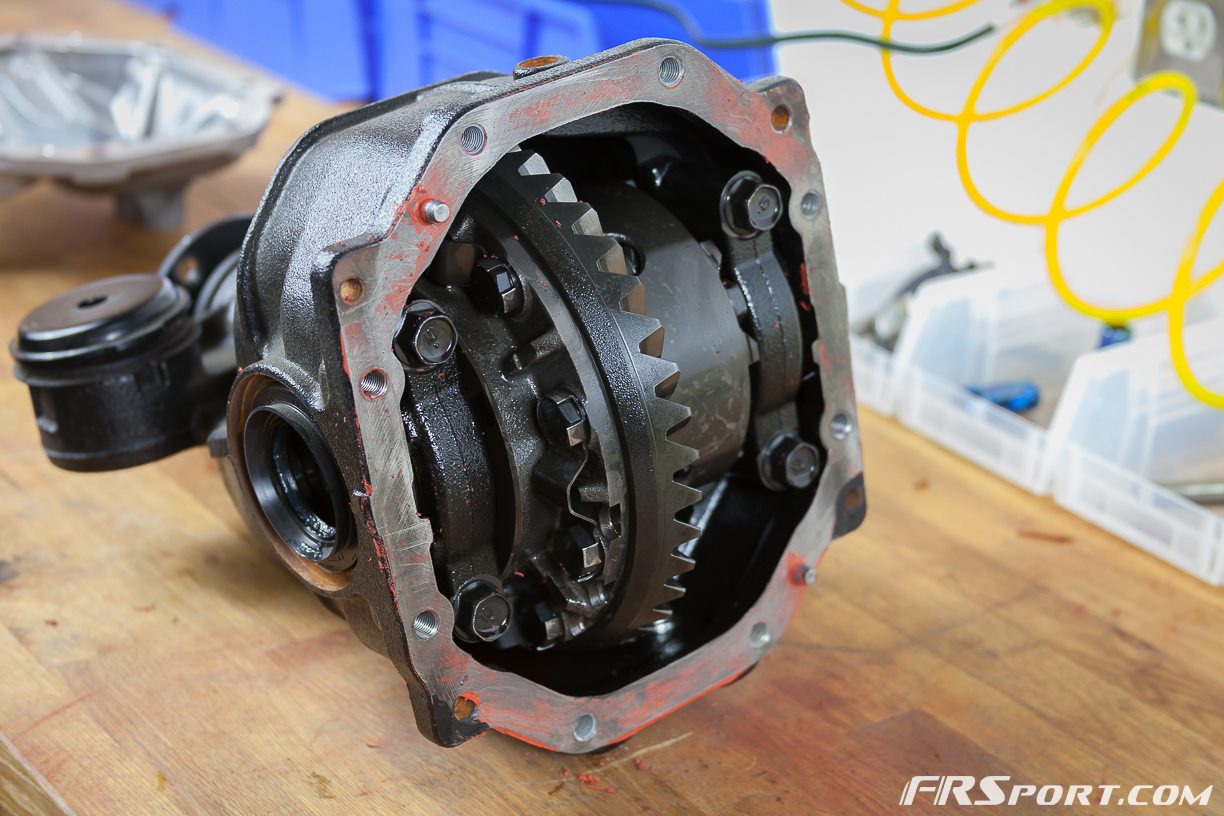
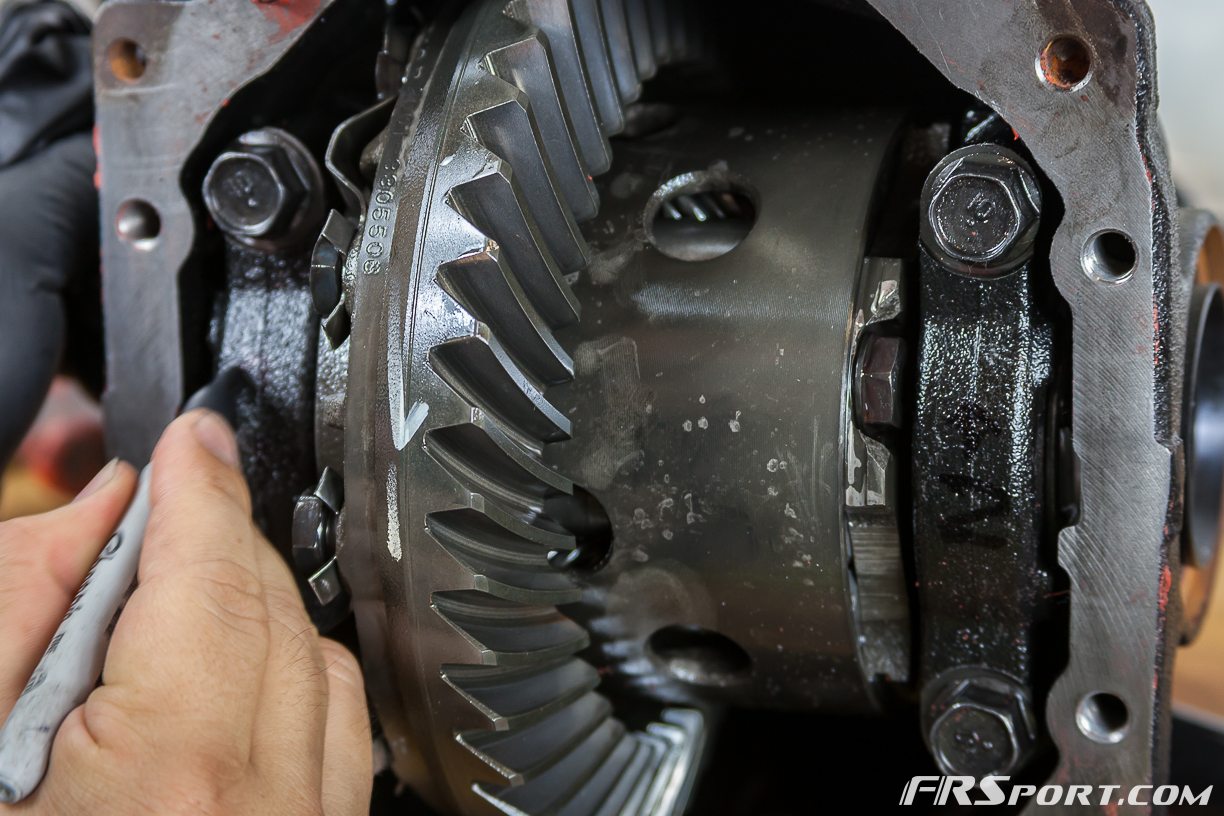
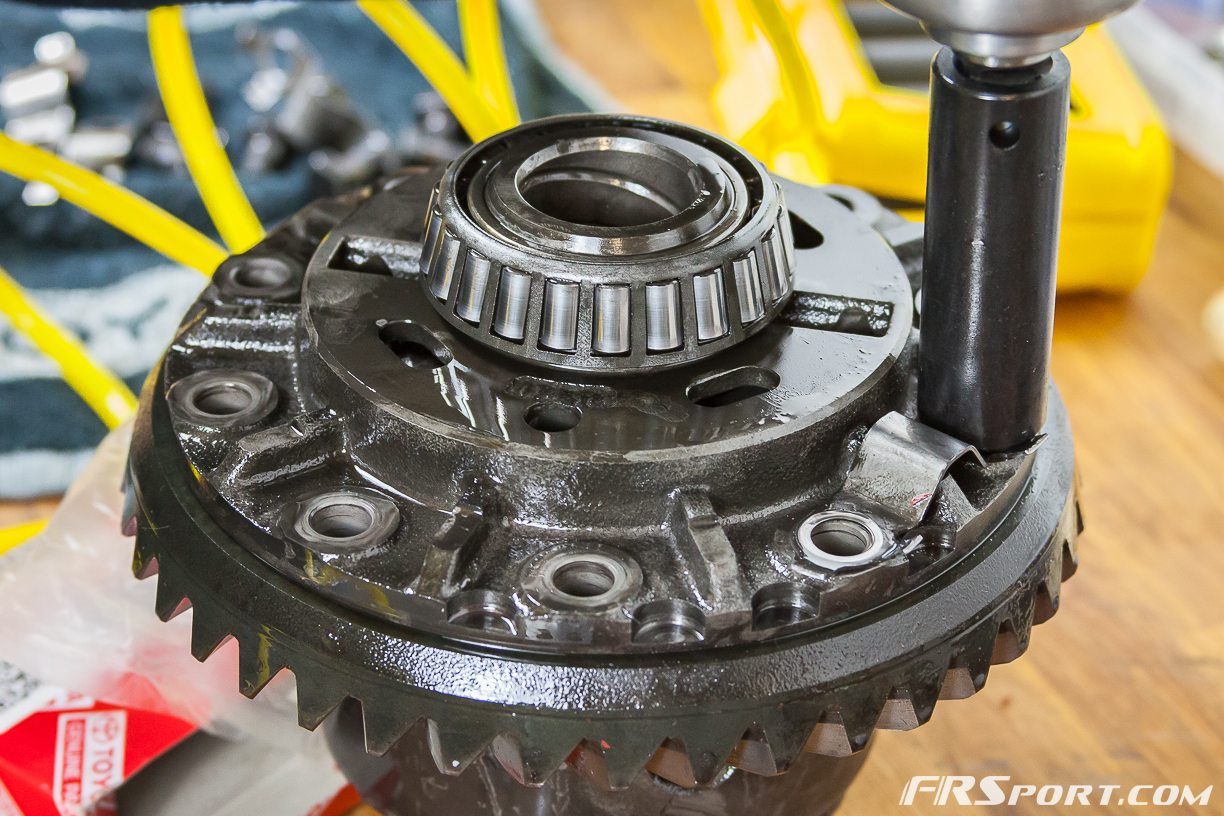
In the next few steps we removed the actual LSD mechanism inside the pumpkin. We began by hammering down, with the aid of a screwdriver, the locking tabs that secured the bolts fastening the LSD Ring. We used various angles to achieve flattening all the locking tabs just enough to let us use our tool of choice. We knew we would not be using these locking tabs again due to the shape of our OS Giken LSD.
Once all the locking tabs had been flattened, we then proceeded to use our impact gun to remove the bolts securing the LSD Ring. We were using an extended 17 mm socket and impact gun for a quick removal. We did this now in order to save us the trouble of having to do this when outside, which would make it a lot harder.
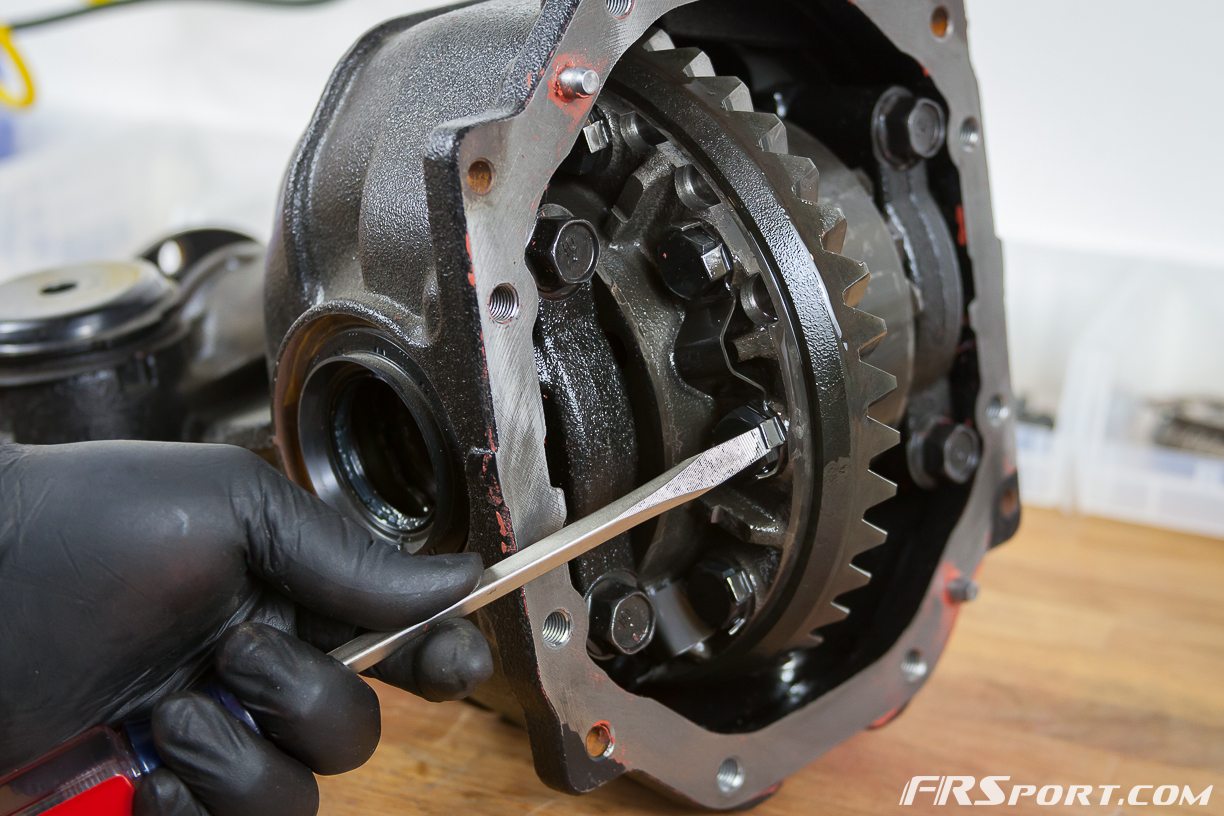
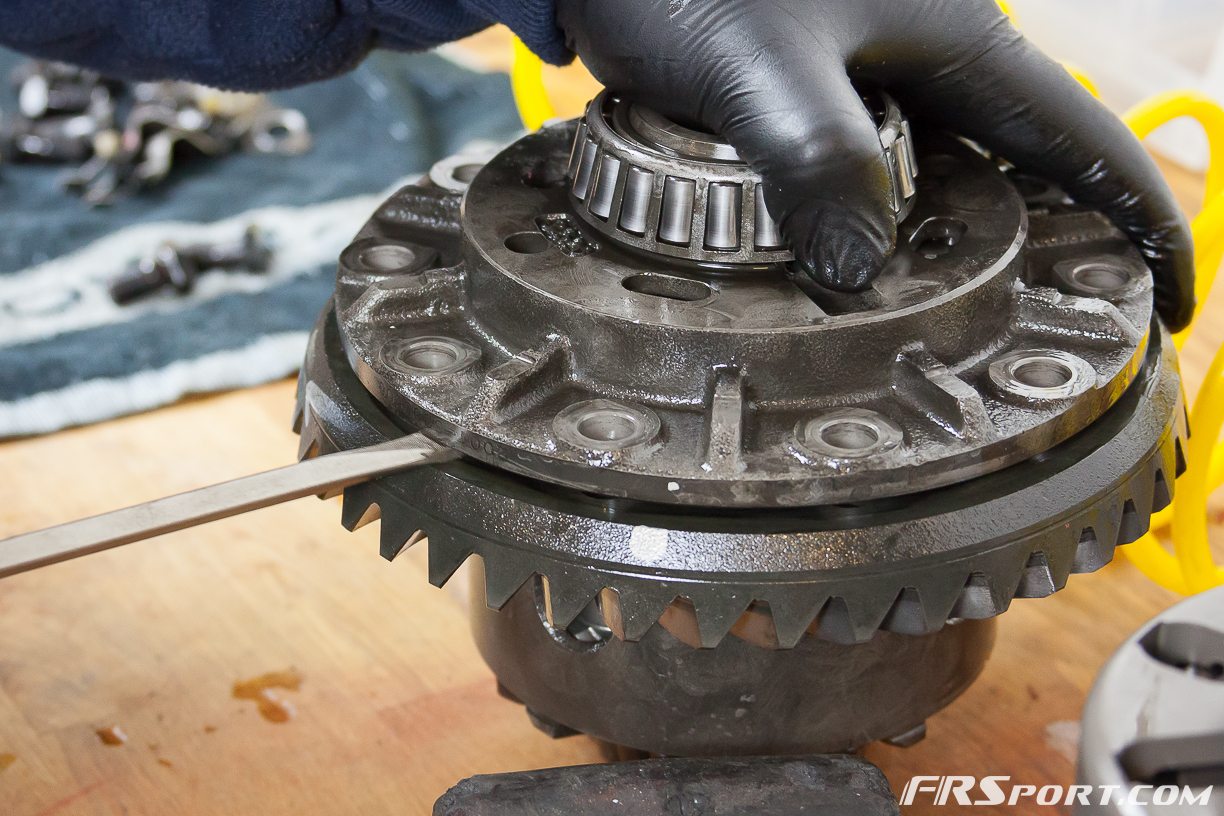
We then marked the two metal retainers securing the Bearing Holder and Bearing in order to maintain a proper re-installation. They are also side specific and is why we marked them as well.

Here you can see we just named them side 1 and side 2.
After we marked them, using the same 17 mm socket, we proceeded to remove both of the metal retainers by removing the 4 bolts and placed them aside; always knowing which was which of course.

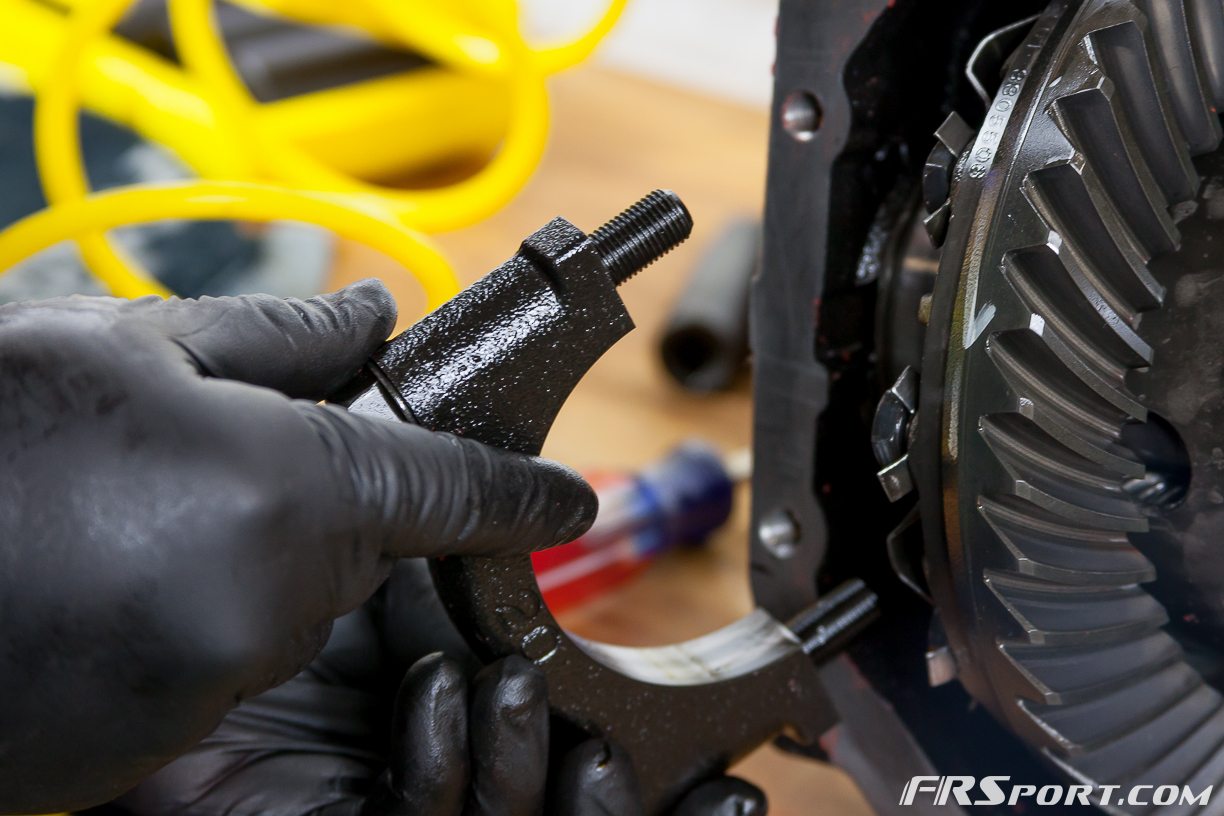
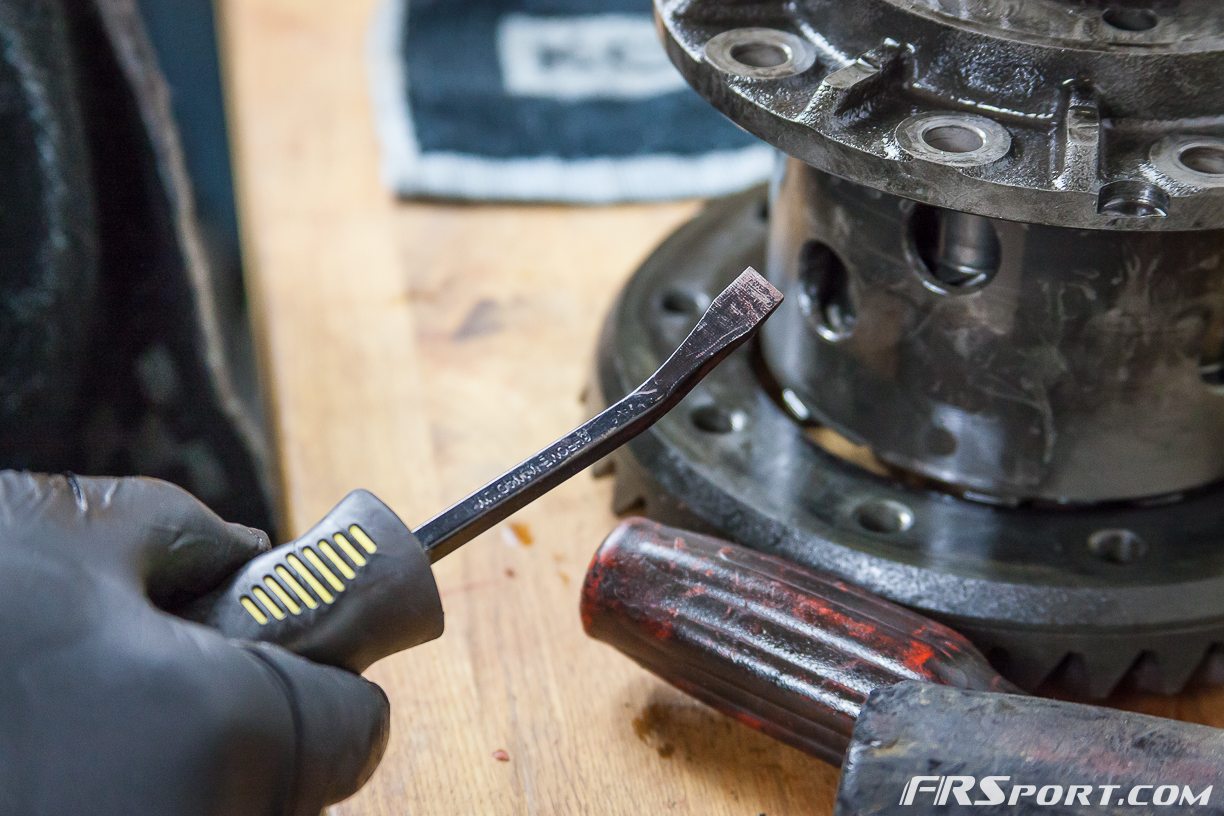
Once the metal side retainers were out of the way we were clear to start removing the actual Differential Mechanism. Be prepared for a fight as this step requires some force.
Using either a strong flat-head screwdriver or crow bar we found strategic points to tap out the diff’. What one could also do is screw back some on some of the bolts used to secure the LSD Ring and use them as leverage. Doing that, we simply tapped and use force, without overdoing it.

As the Differential started coming out, better leverage points appeared and we started using those to remove the mechanism.
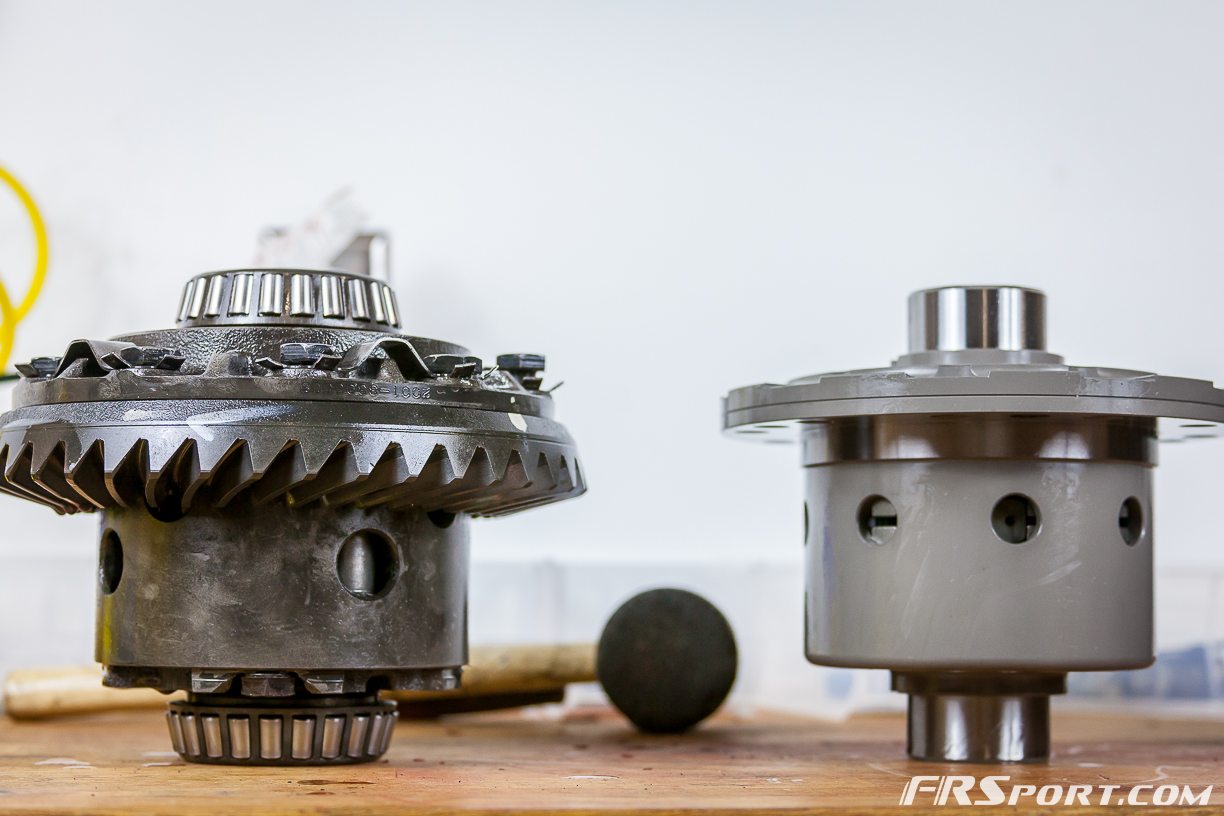
Once we had the LSD out it was time to prep it for re-installation; using new parts and borrowing some from the oem lsd. In theory it was possible to re-use the bearings of the outgoing LSD but we risked damaging or warping the bearings and so it was a better idea, in our minds at least, to source new ones from either Toyota or Subaru.


The Part number for these bearings is 9036650001 from Subaru. We had to press them on ourselves and would recommend people have a professional do it for them. It doesn’t make sense forcing these on inaccurately. When you purchase the said part number above you get one bearing and one holding metal sleeve which means you only have to buy a quantity of two of the part number above to get the job done.
The one item we did have to swap over was the LSD Ring. It doesn’t matter what order you swap the ring out or press the bearings either. We began by removing the bolts we screwed back on to help us remove the Diff’ from the pumpkin. Once all they were all out we proceeded to the next step.
Using a combination of flat-head screwdriver, crow bar, and mallet we began taping out the ring. It will be difficult to budge initially but once it starts moving, it will be easier to tap out.
We used an angled flat-head screwdriver for the last push. Once out, we proceeded to bolt the ring onto the new LSD, in this case we were installing an OS Giken Super Lock unit as mentioned before.

Before bolting up the OEM LSD Ring to the OS Giken Diff’ however, we made sure to coat them with some Loctite Thread Locker. The reason being that we would not be able to re-use the thread locking tabs found in the OEM LSD.
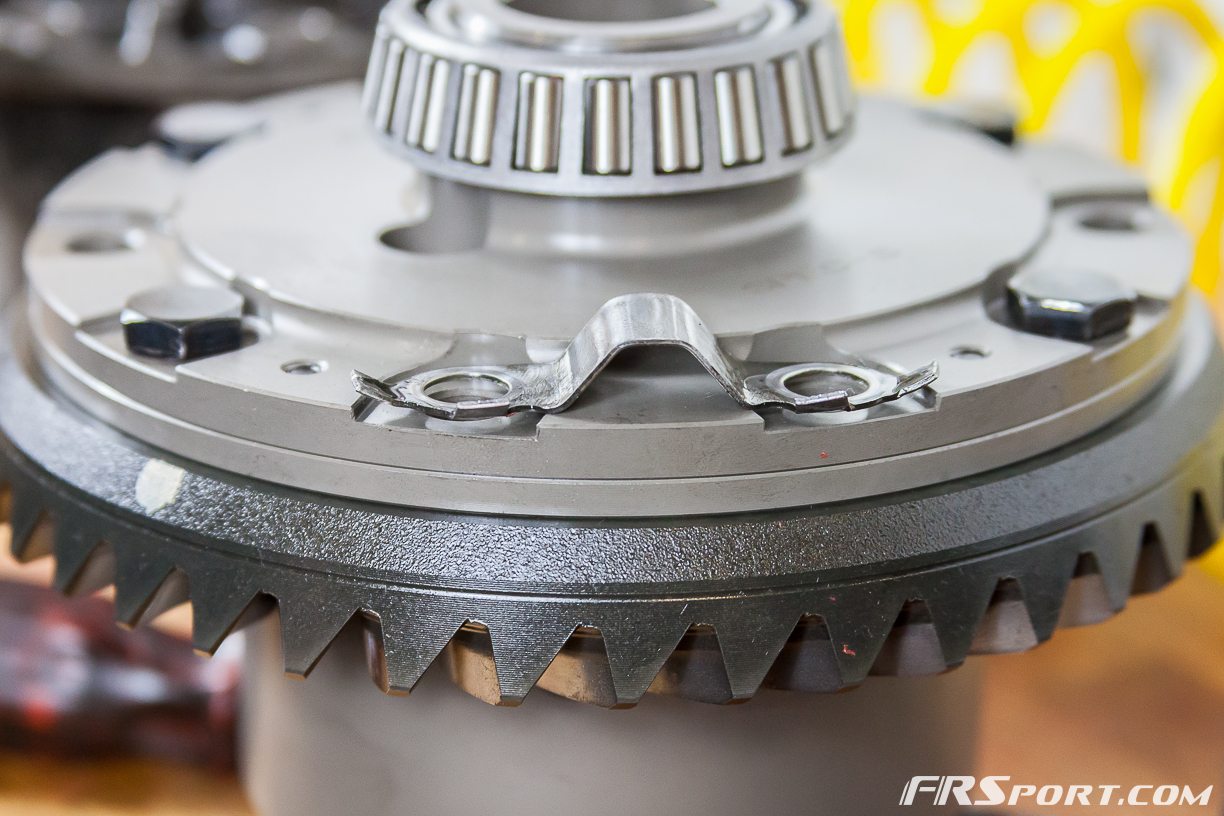
As you can see in the image, they do not clear the construction of our OS Giken LSD. It is common knowledge however that they are not needed and we would be ok simply using the Loctite Thread Locking compound.
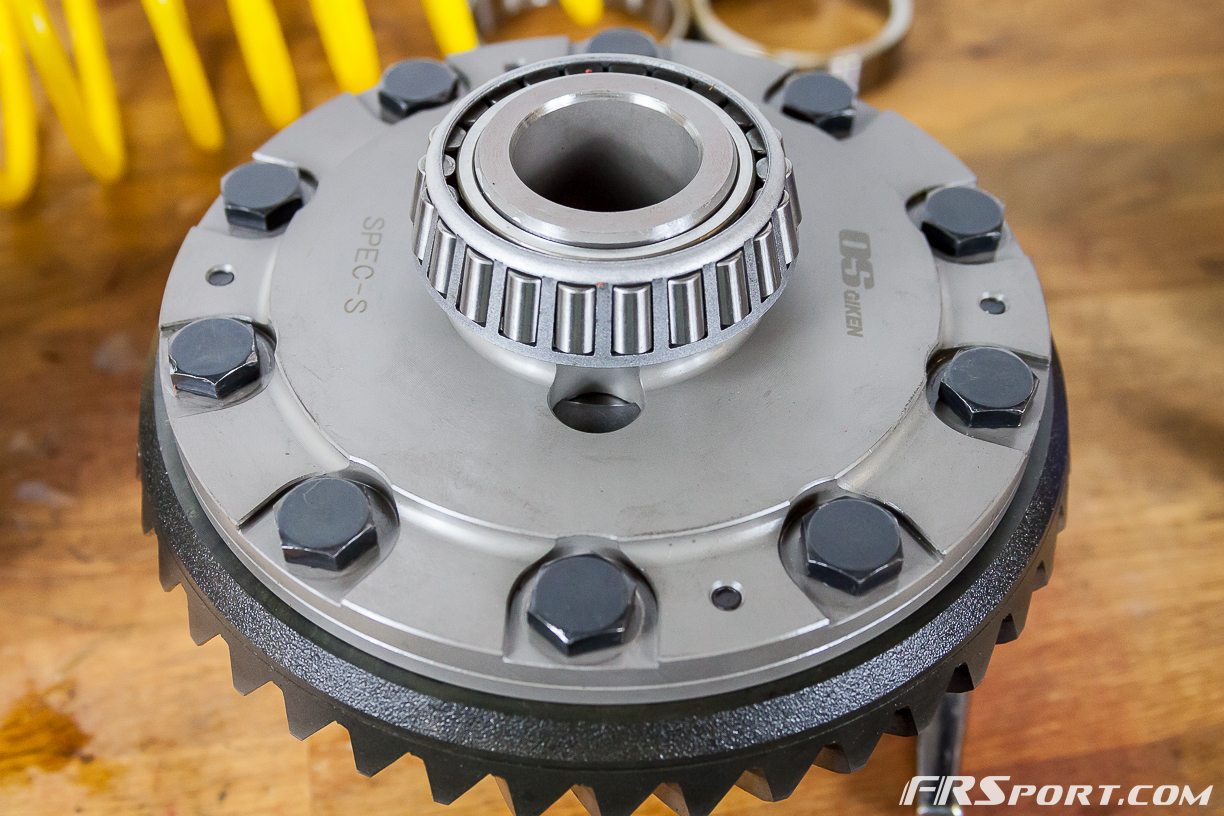
After all the bolts were coated with Thread Locker, we continued securing the rest of the bolts to the LSD Ring. Once all the bolts were in we had to tighten them at a temporary torque level. We used about 41 lbs of torques to temporarily tighten the ring before we put the whole differential back in. Doing this would allow us to later tighten it better once inside the diff pumpkin.

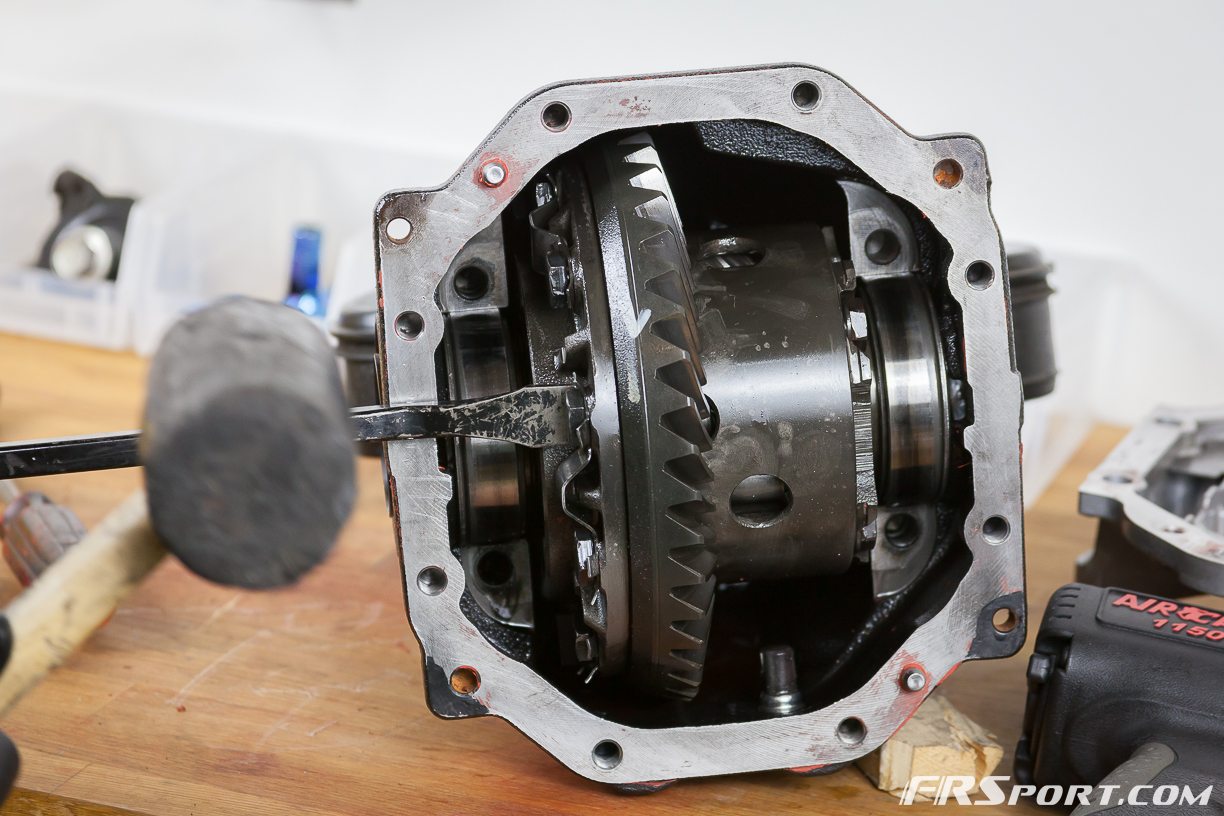
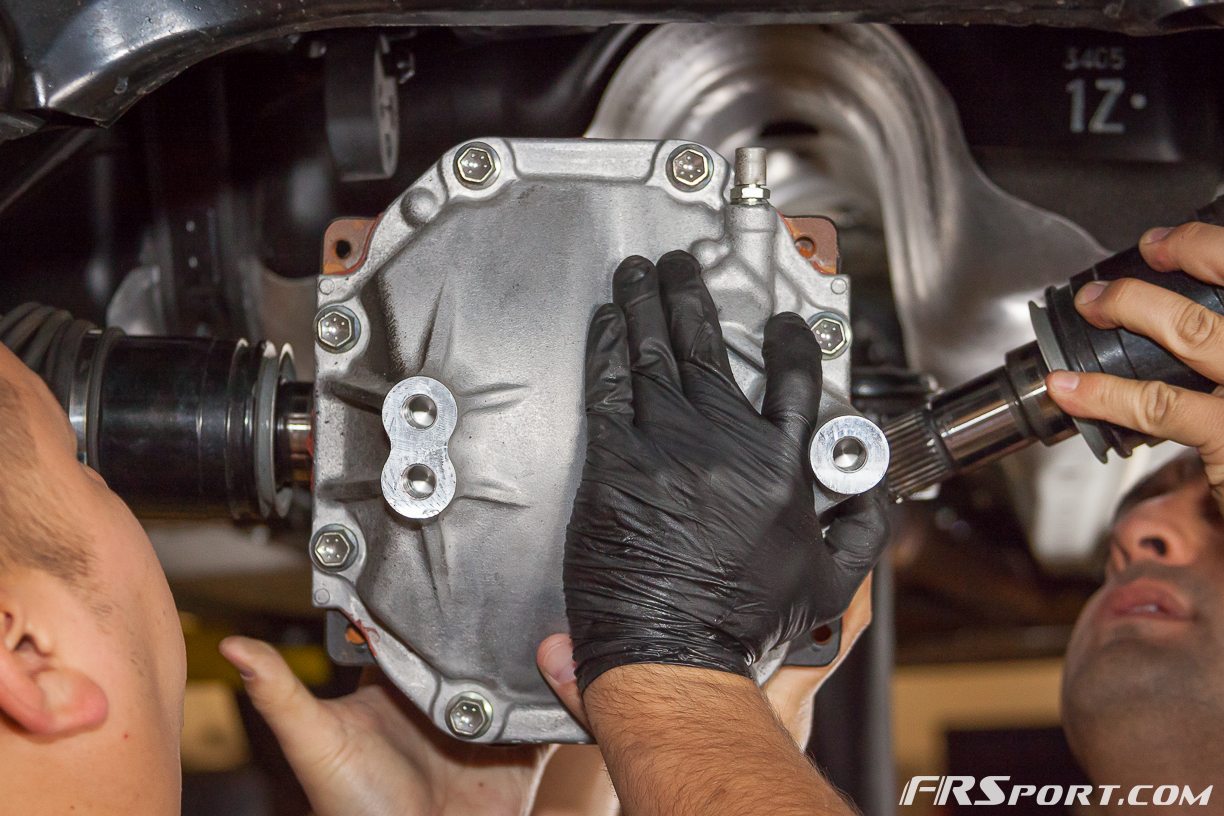
After we had placed the LSD ring onto the Differential it was now time to work on putting it back inside of the actual pumpkin. This part is extremely tricky as we had to hold the bearing covers in place as the differential went inside of the pumpkin. They moved a lot so we did our best to try to keep them in place as the unit went in.
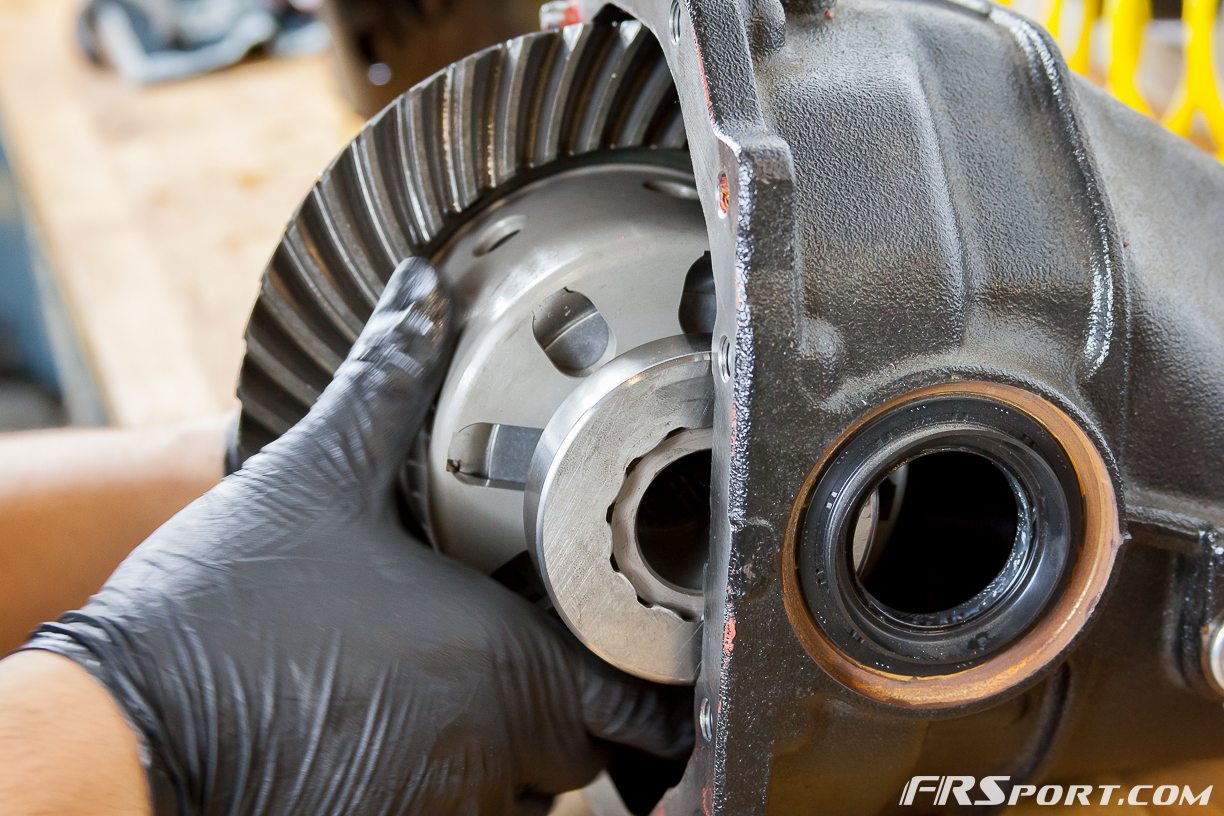
Making sure that everything went in straight was extremely important. The unit needed to be straight and the bearing covers need to be in place as it slid inward.
Once we verified that the differential was going in straight, we used a mallet and small piece for wood to continue taping it into place. You may want to steer clear of metal on metal contact as it could warp some surfaces. Having a partner hold the pumpkin as we tried to massage it back in was extremely helpful. (It pays off to have friends haha)
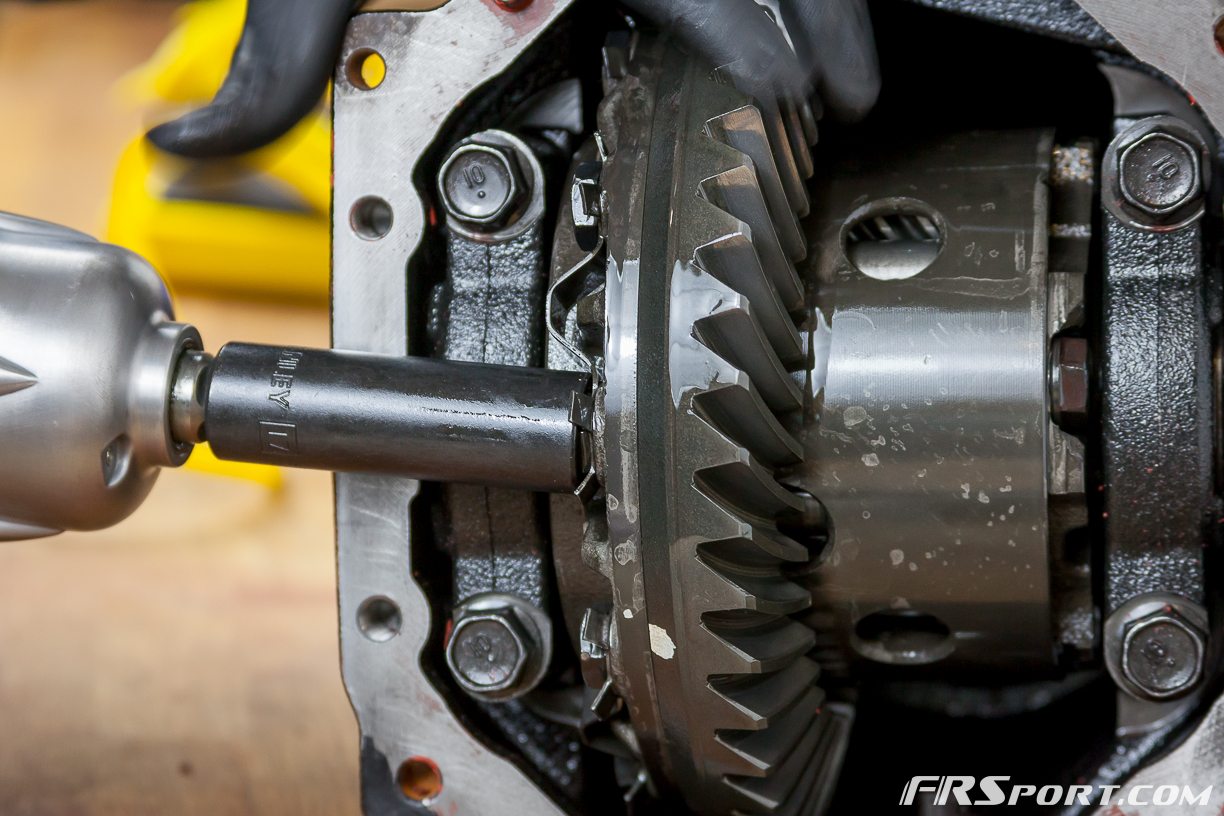
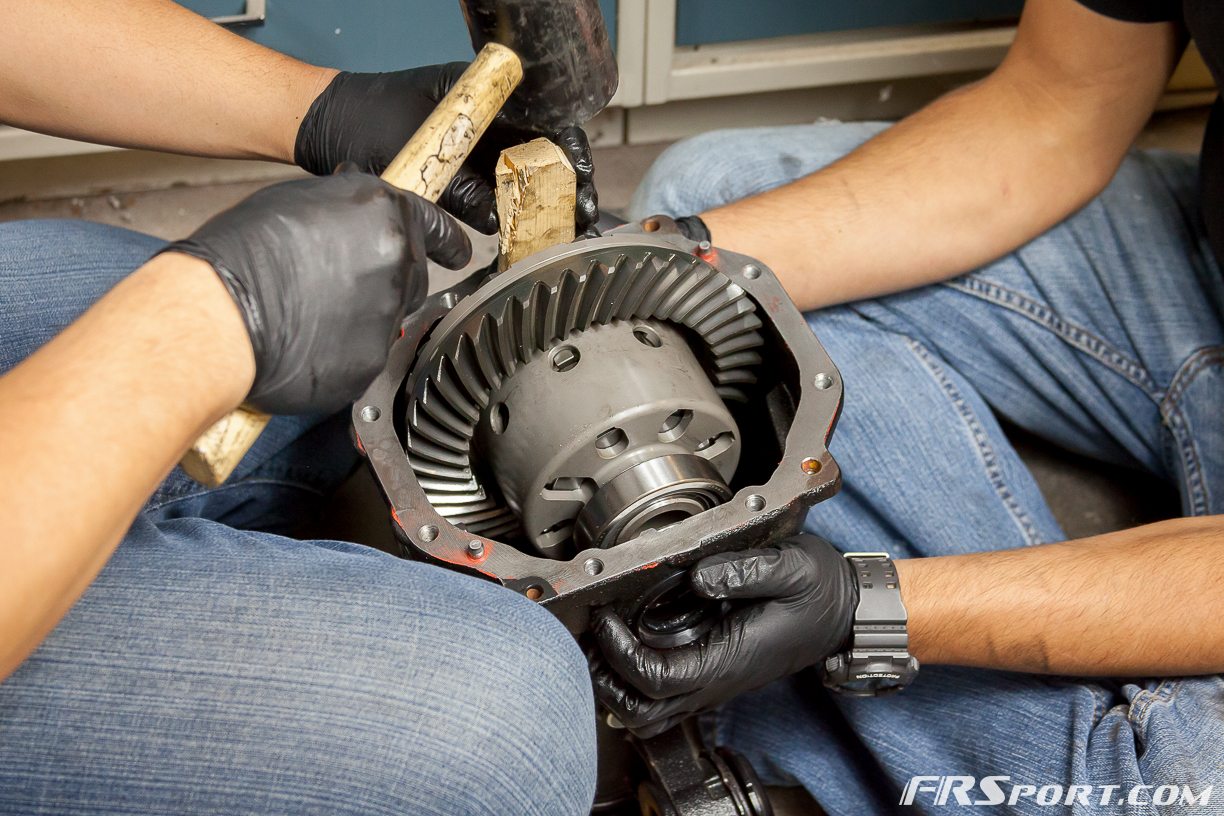
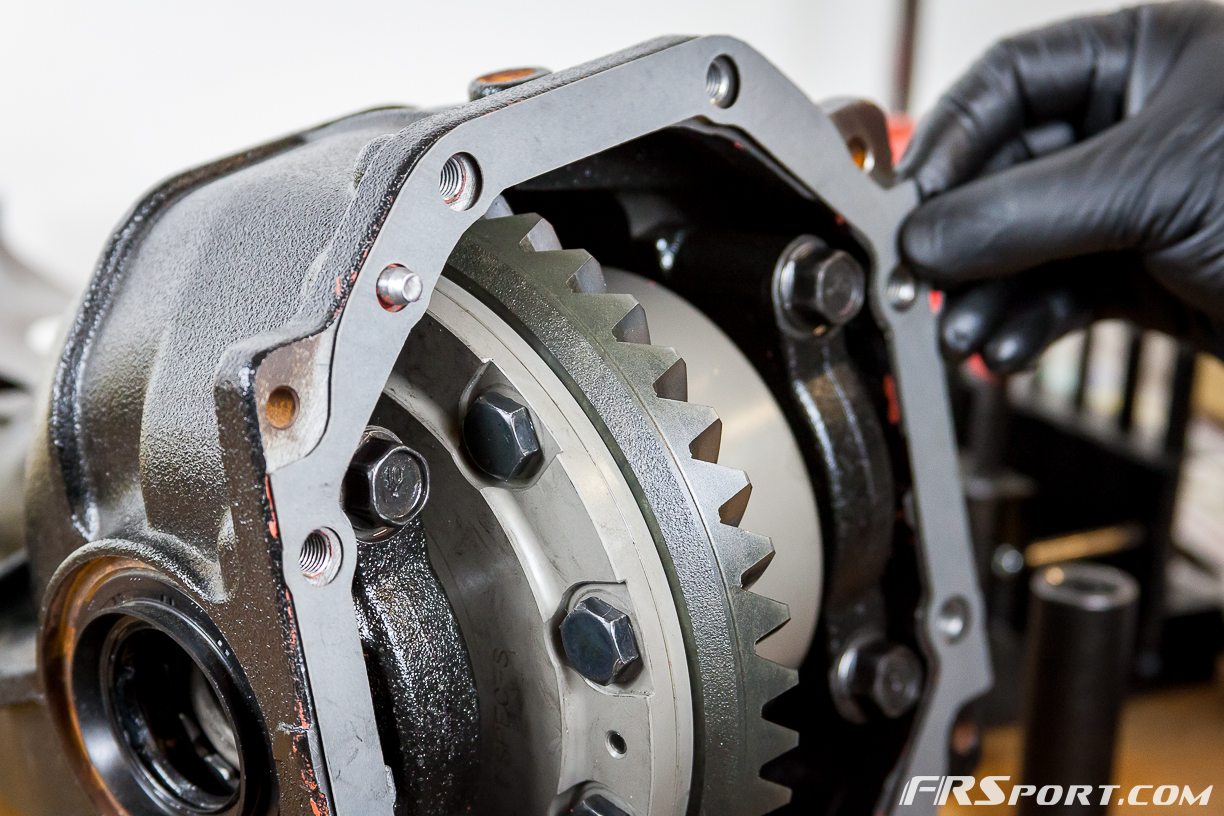
After we had succeeded in properly placing the differential inside the pumpkin, it was then time to bolt on the “Bearing Holding Brackets”. These are the black brackets located to the sides of the differential. We remembered to bolt them on the correct side from which we unbolted them. Also at this point we had to continue to tighten down the LSD ring all the way up to factory torque levels.
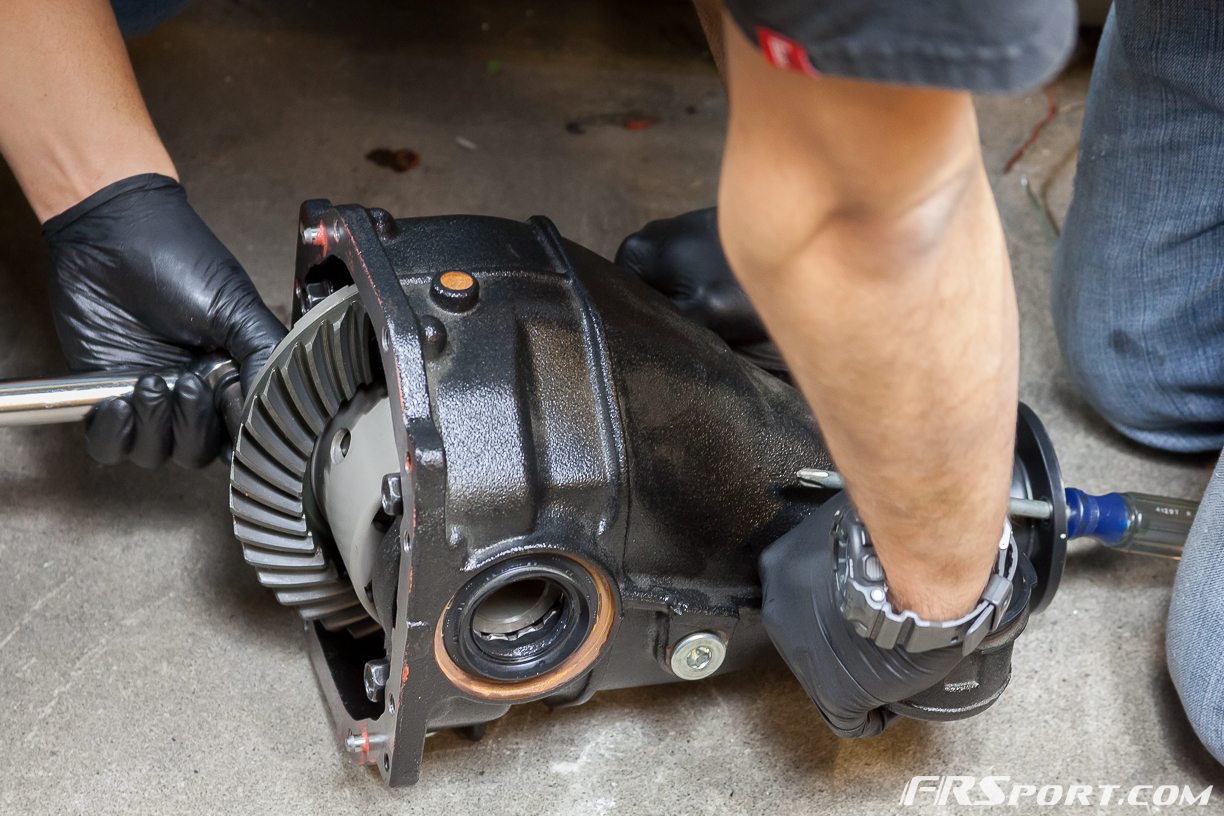
The goal was to get it as tight as the factory FSM recommended. Traditionally torque specs for a LSD ring range between 95 to 100 Lbs of torques. At some point doing this becomes very hard so with the help of a friend we had him or her place a metal screwdriver through the pinion wheel (the part that connects to the driveshaft) and use that leverage to tighten the LSD ring all the way up to the desired torque specs. Once finished we were ready to perform some final measurements.
The next few steps are recommended to be done by a professional or at the very least someone with the appropriate tools to measure the backlash, or amount of play before the differential gear starts to contact the Pinion Gear, and the contact pattern on the same differential ring and pinion gear.
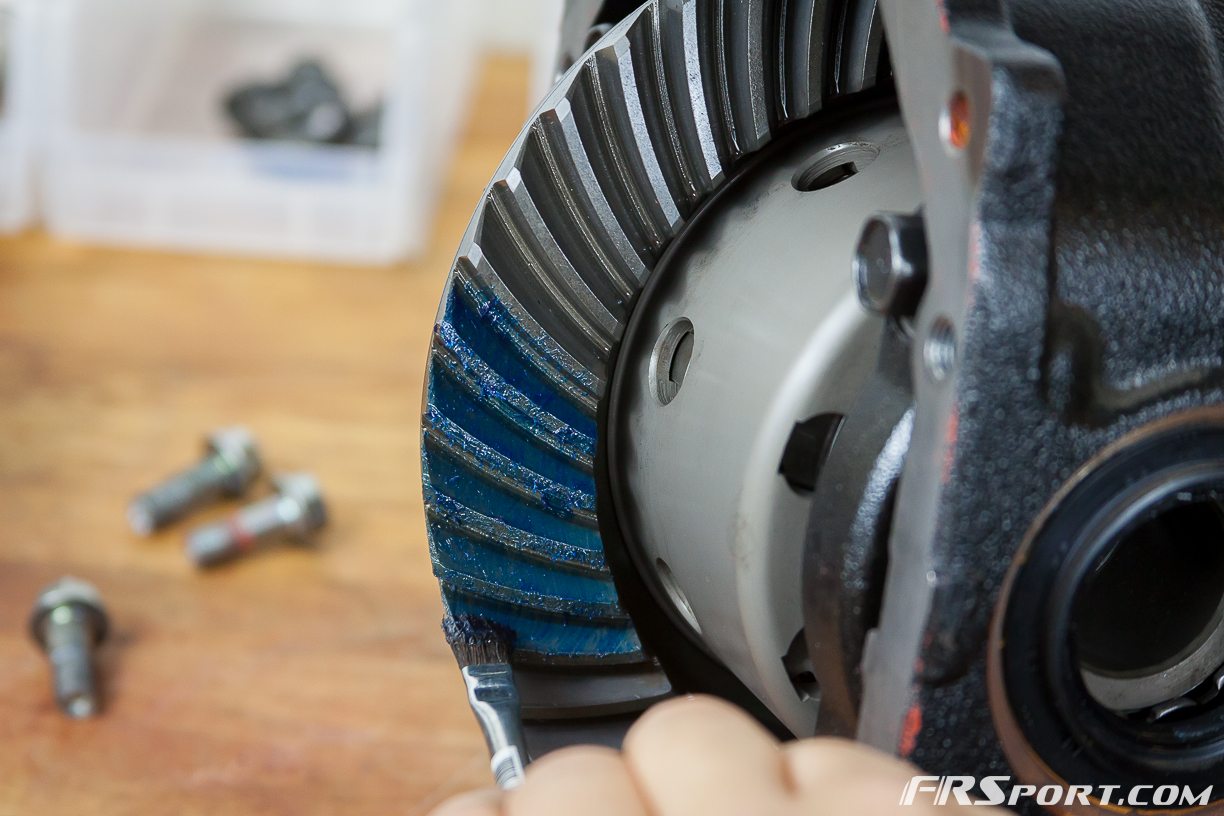
Here we painted on some Blue Loctite Marking fluid in order to inspect the engagement of the diff ring with the pinion gear.
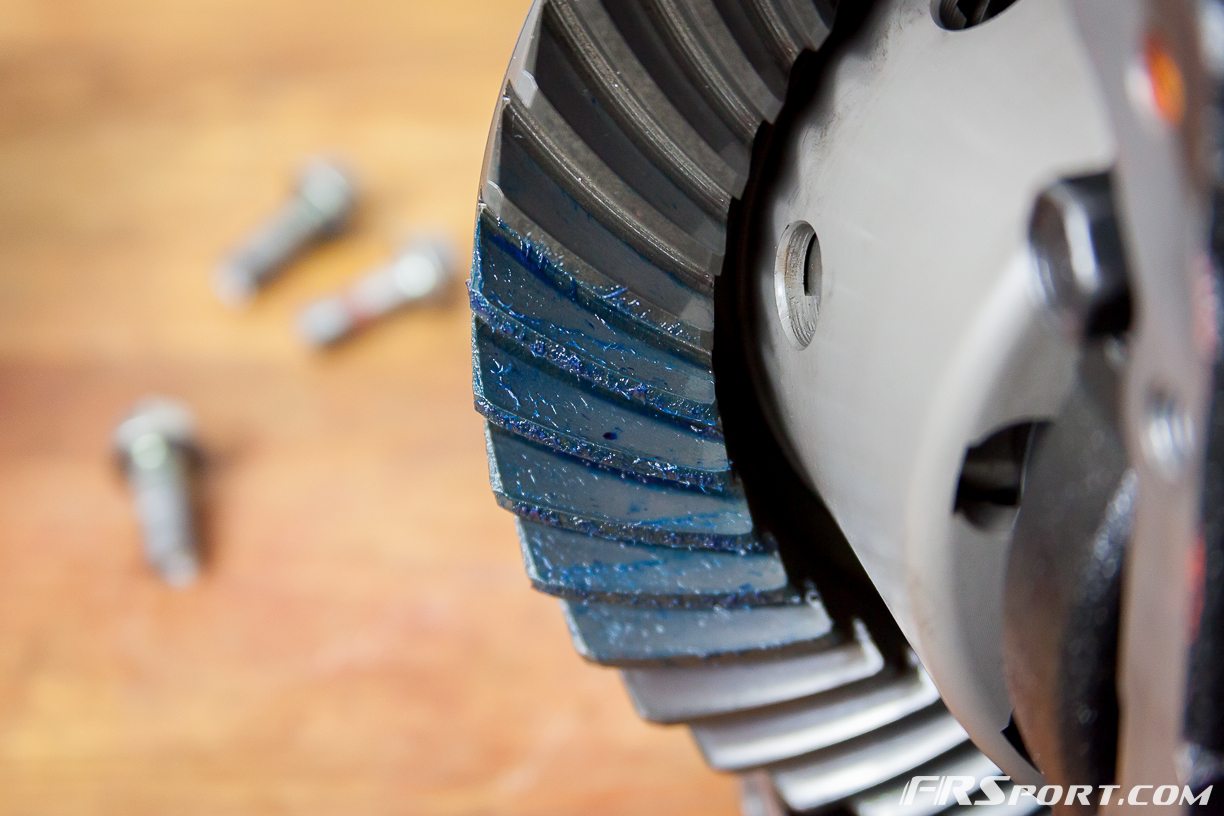
After rotating it a few times we observed the contact surface and evaluated the pattern. Here we were able to see just how off the contact was and whether or not we needed to re-install the differential again.

Using a dial indicator, we positioned it so that we were able to measure the play between the differential ring and the Pinion gear. We used the Subaru FSM to verify the correct threshold of this effect. Technically you do not want the pinion and diff’ ring to suffer too much shock upon engagement or be too tight that it wears down both gears; it had to be well-balanced. After this technical step was complete we continued on to the next final steps.
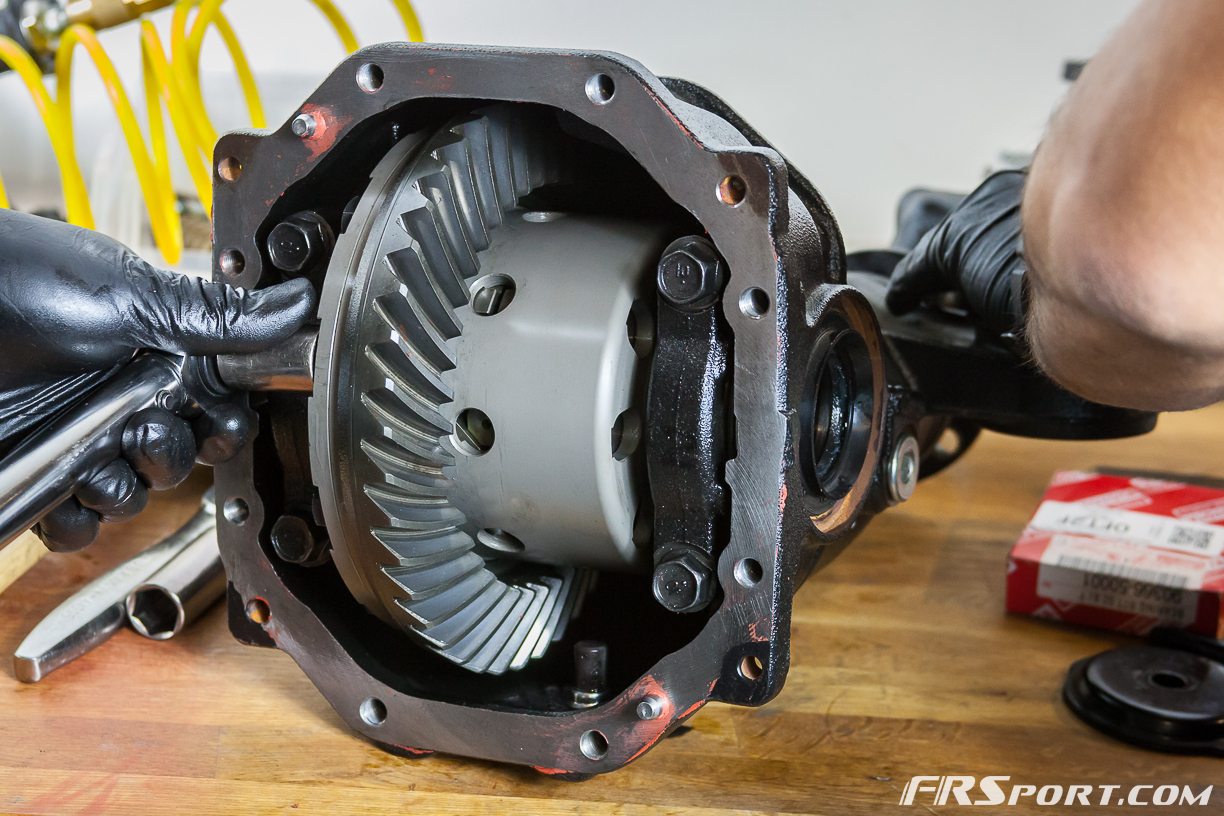
After all business with the internals of the pumpkin were dealt with, we began buttoning up the rear cover of the unit. We placed the DIF gasket mentioned earlier over the surface that mated to the differential cover. Again, if you do not have access to the gasket, Red RTV will do the trick. We made sure to place it on correctly as well.

Once the gasket had been set, we proceeded with tightening the 8 differential cover bolts. These simply have to be fastened securely and not ridiculously over tightened.
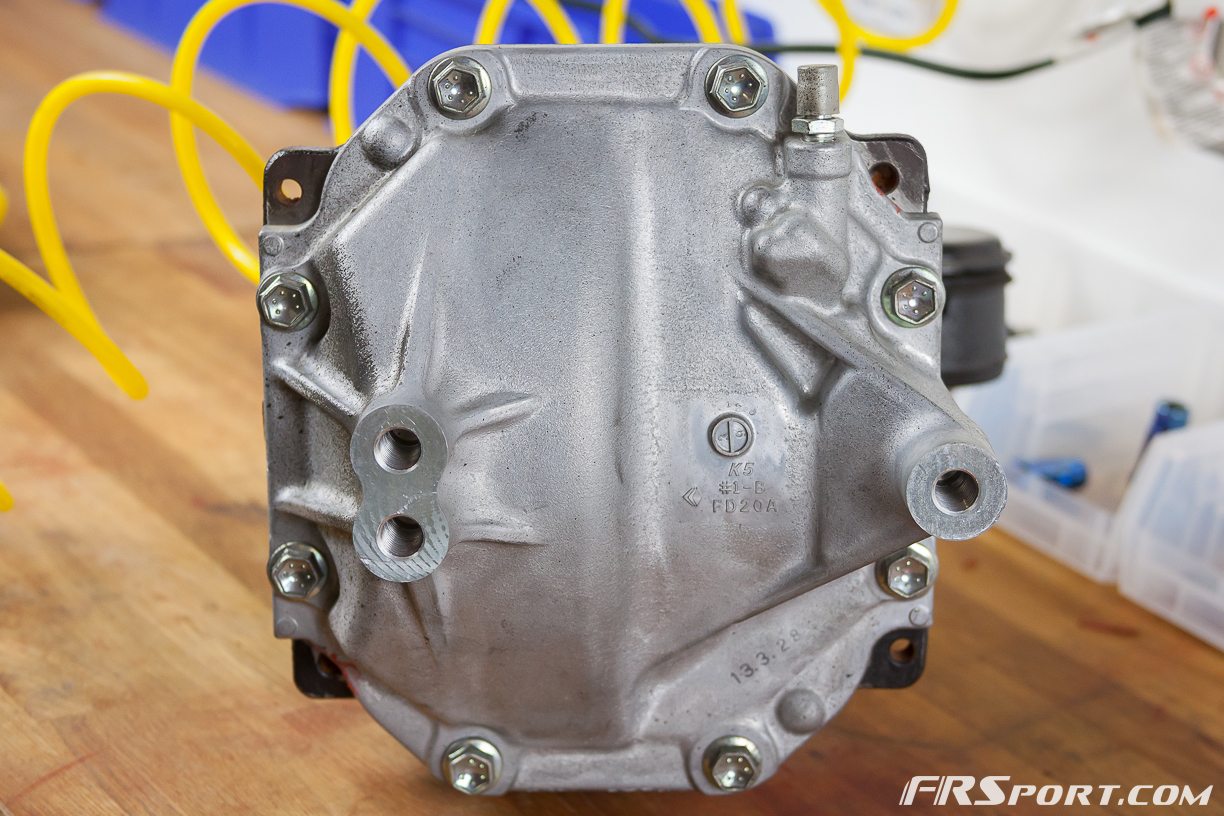
We inspected the rear cover and made sure everything was securely sealed.
Re-installation was pretty straight forward and resembled the removal. We inserted the driver’s side axle into the pumpkin first and then followed by inserting the passenger’s side next.
As we raised the differential pumpkin, we bolted the back of the differential cover and the two front differential ears to the rear sub-frame at its corresponding spots.
We then finally bolted the drive shaft to the pinion gear at the front of the pumpkin.
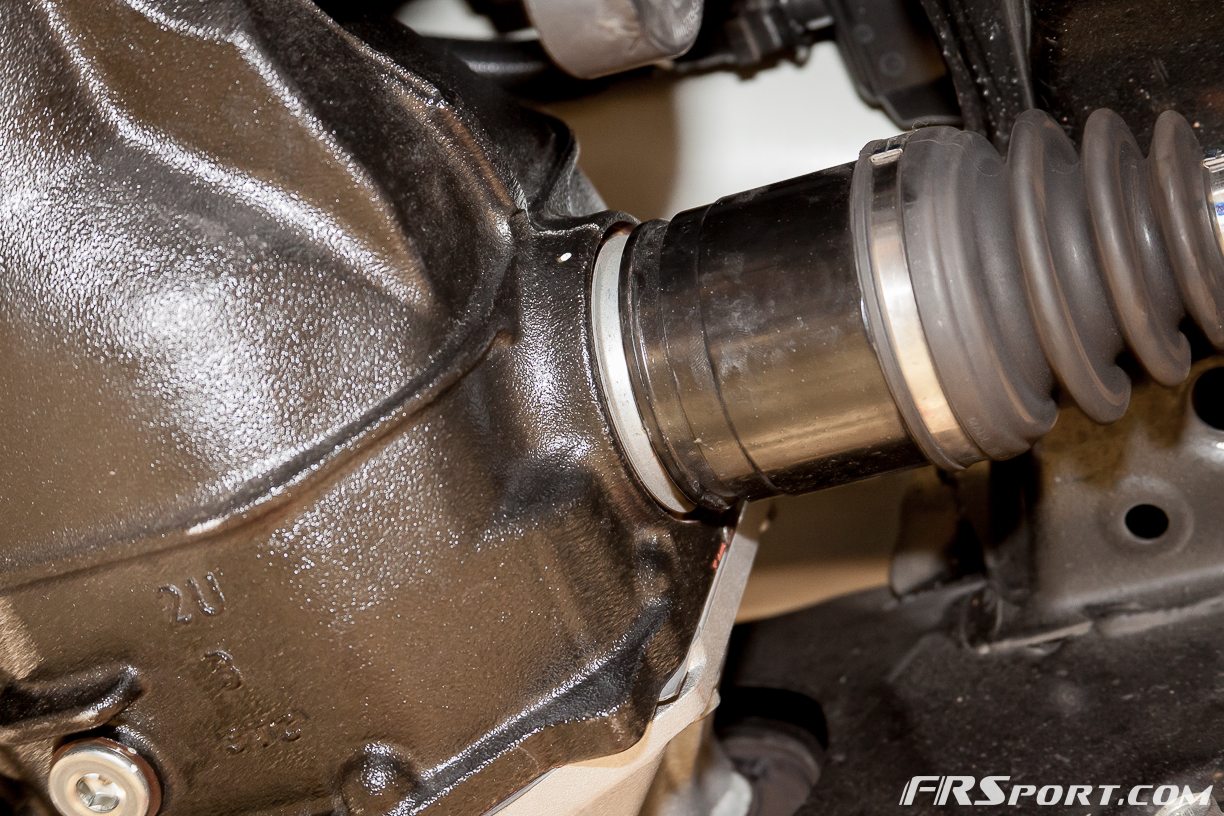
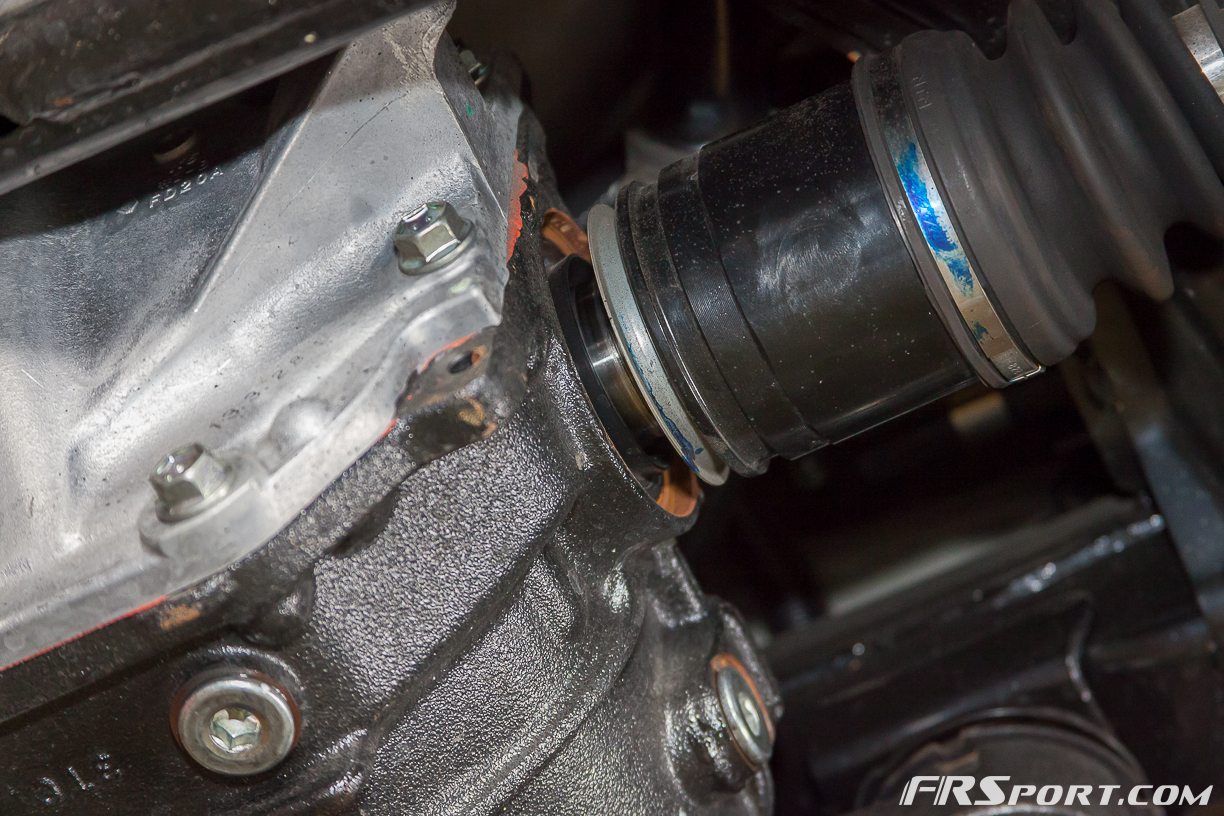
Using a soft mallet we made sure our axle went in enough to engage and seal the area originally removed from. In the picture here you can see just how close they have to be to the pumpkin.
After this anything else we disconnected in the process of removing our pumpkin got bolted up as well and we were all set. The OS Giken Super Lock Differential we installed did not need break in but if you’re following our steps consider yours might. We would recommend you follow the appropriate break in procedures for your LSD and enjoy your upgraded traction; we certainly have!